How to use an airbrush for modeling
The airbrush is the tool that marks a before and after in the trajectory of any modeler. Whether it is to apply perfect primers, create color transitions impossible to achieve with a brush, or to speed up the painting of large surfaces, understanding how to use an airbrush correctly opens up a wide range of creative possibilities.
However, facing this device for the first time can be overwhelming due to the complexity of its components, managing pressures, or achieving the perfect proportions of the paint mixture. Therefore, in this Green Stuff World guide, we explain step by step how to use an airbrush from scratch.
1. Basic equipment to use an airbrush
Before starting to work with the airbrush, it is fundamental to have all the necessary elements and to know what each one is for.
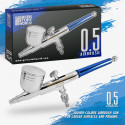
• Double-action airbrush. This type is a standard for working with precision in modeling. Unlike single-action ones, these devices allow you to control both the air flow (by pressing the trigger down) and the amount of paint (by moving the same trigger back) independently. This duality is what allows you to perform everything from opaque base coats to lines as fine as a hair, among many other personalized actions.
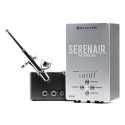
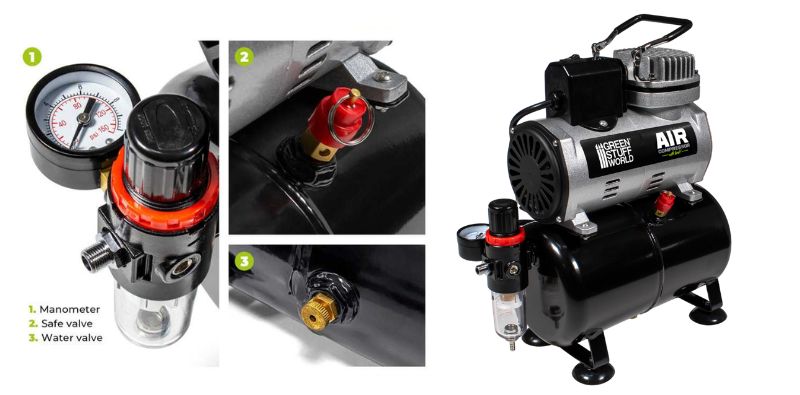
• The compressor with a tank. The compressor is indispensable to make the airbrush work. It is recommended to use an airbrush with models that include a reserve tank to ensure the air comes out smoother, continuous, and regular. Furthermore, it prevents the motor from running constantly, reducing noise and, most importantly, eliminating air pulsations. It works by charging the tank with air; once full, the motor turns off until the pressure drops too low. Result: less noise, less heat, and a longer useful life. However, these compressors are more expensive. If you cannot invest in a tank compressor, acquire one without a tank; you can still paint just as well, even if it is a bit more uncomfortable.
• Regulator and moisture trap. Compressed air generates condensation. Without a moisture trap, small drops of water will travel through the hose and be shot out along with the paint, creating spots on the miniature. A regulator with a pressure gauge allows you to adjust the exact PSI for each technique.
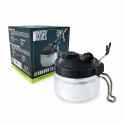
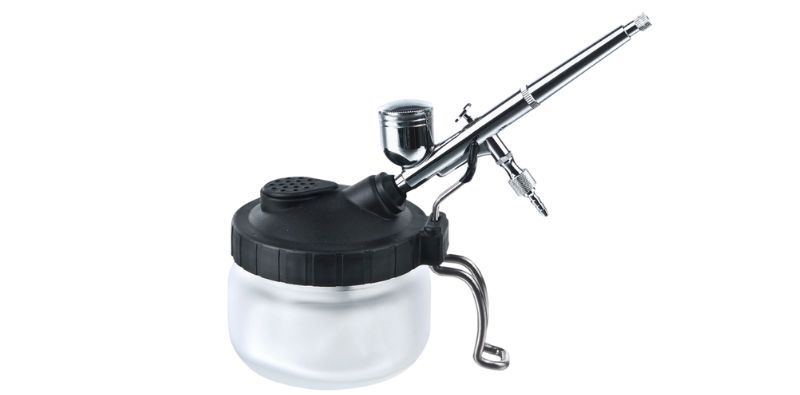
• Cleaning station. This tool not only facilitates cleaning the airbrush but also offers a secure support during painting sessions, avoiding falls that could bend the needle or cause other imperfections. On the other hand, it allows you to purge paint and solvent residues safely, filtering toxic vapors and keeping the air in your creative space clean.
2. Paint preparation
To explain how to use an airbrush, it is fundamental to first indicate how to treat the paint for the airbrush. Acrylic paint for modeling has a viscosity designed for brushes, making it denser than what the interior of the tool can handle. If it is introduced into the cup directly from the bottle, the needle will not be able to displace the pigment, and the nozzle will clog before the paint even comes out.
Traditionally, the convenient consistency for the airbrush is often compared to that of milk. The paint must have enough fluidity to slide down the walls of the airbrush, but maintaining the necessary opacity to leave a coherent trail of color, so it is important to use quality paint. Achieving this balance requires the use of a professional Acrylic Thinner. Unlike water, which can break the cohesion of the pigment, specific thinners contain retarders and chemical surfactants. These additives reduce surface tension and delay drying at the tip of the needle, allowing for much longer and smoother painting sessions without interruptions to clean the nozzle.
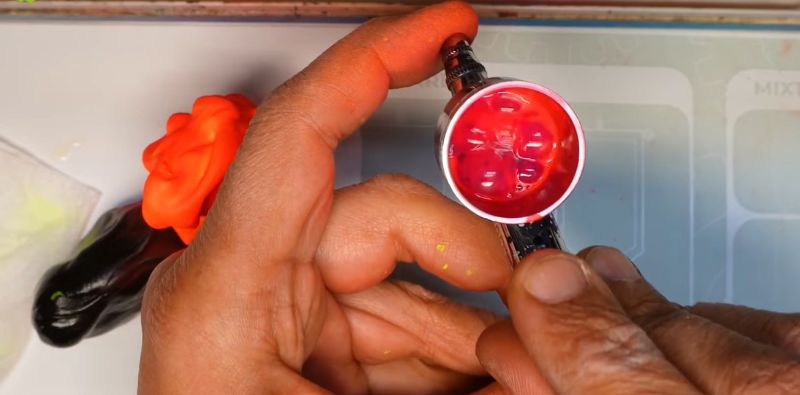
The mixture is made directly in the cup and, normally, the paint-to-thinner ratio is 1:1, although everything depends on the thickness of the paint used. It is enough to introduce the same number of drops of paint as thinner. To mix both products, you can use a brush or the airbrush itself. If you cover the nozzle and pull the trigger back, the air will come out through the cup, mixing what is inside. Generally, if you have a short track record of using these tools, you might not reach the consistency you need with the first mix. Don't worry, you can correct it by adding more paint or thinner, depending on whether you need a thicker or more liquid mixture. Keep testing the result on a test surface until you achieve what you need.
A clear indicator that the paint is overly diluted is that the airbrush does not atomize well and the paint comes out with uncontrolled splashes or splattering, forming runs instead of a uniform finish.
If, on the contrary, the tool becomes clogged, you can use the same “backflushing” method so that part of the paint returns to the cup: cover the nozzle and pull back on the trigger so that the pressure pushes the paint back.
Another option is to buy airbrush paint such as Green Stuff World’s, which is used directly without the need for dilution.
3. How to use the airbrush trigger?
Learning how to use an airbrush requires developing muscle memory to use the trigger. Its movement is not a simple “click,” but a movement divided into two steps that must be mastered until they become instinctive. First, press down to release a constant flow of air. Second, slide gently back to allow the needle to retract and make way for the paint, which will begin to be sucked by the air flow to the nozzle.
The golden rule of airbrushing is: always start with air, add paint, cut the paint, and end with air. If you cut the air flow while the needle is still retracted (paint position), a small amount of wet pigment will remain on the tip of the nozzle. When you press the air again in the next shot, that drop will be blown away as a splash, ruining the work done so far.
4. At what pressure does an airbrush work?
Air pressure, measured in PSI (pounds per square inch), is the variable that determines how the paint is atomized. There is no universal perfect pressure, as it depends entirely on the viscosity of the mixture, the proximity to the model's surface, and the compressor model.
• Base coats and priming (18-25 PSI). To cover wide surfaces, a higher pressure ensures that the paint is atomized into fine particles that cover homogeneously. The recommended distance is 10-15 cm from the piece, moving the tool in constant passes to avoid accumulations of liquid paint.
• Details, highlights, and gradients (8-12 PSI). When precision is sought, we lower the pressure. This allows you to be closer to the miniature (even at 1 or 2 cm) without the force of the air displacing the fresh paint, creating the so-called “spider legs.” In this range, the paint must be more diluted, almost like an ink, so that it can flow despite the low air pressure. Controlling this relationship between proximity and low pressure is the key to performing outlines and highlights with a smoothness that a brush can hardly match.
How to use the compressor for the airbrush
Before controlling the compressor pressure, it is fundamental to know how this device works, because although it is not complicated, several aspects must be taken into account. In case you have never used one, we explain step by step how to configure it to use an airbrush:
1. If your compressor has a tank, make sure the drain plug (if it has one) is closed. The valves must also be closed to avoid air leaks.
2. Take the hose that the device usually includes and identify the ends; one connects to the compressor and the other to the airbrush.
3. Connect the compressor end to the air outlet (it may have a thread or a “push-in” type quick connector). Make sure it is well-fitted, without air leaks. At the other end, connect your airbrush. Again, if it has a thread, screw it in carefully; if it has a quick connector, push until it clicks. Check that there are no twists or bends blocking the air.
4. Connect the compressor to the power and turn on the main switch. Some take a little while to start.
5. Observe the pressure gauge (if it has one) or pressure indicator to verify that the air begins to accumulate in the case of having a tank.
6. Locate the pressure regulator knob and choose the one that best suits you according to the type of piece you are going to paint.
7. Open the airbrush trigger (press slightly down) to test the air flow. Adjust the pressure if the stream is too weak or strong.
8. Before using paint, test the airbrush with water or on a piece of test paper. Press the trigger and check if the air comes out smooth and uniform. If there are “pulses” or the air sounds strange, check connections, hose, or tank drainage.
9. Prepare the paint in the cup.
10. You can now start painting as we explained previously. Press the trigger to start the air, then push back to retract the internal needle and let the paint out. When you finish, first center the trigger and then stop pressing it so that air is the last thing you cut.
11. Clean your airbrush.
5. Maintenance and cleaning
90% of technical failures that occur when learning how to use an airbrush are not due to a defect in the device, but to poor or incorrect cleaning. Acrylic paint dries fast and, once solidified inside the ducts, it can be difficult to remove without damaging any parts.
There are two types of cleaning that you should integrate into your routine:
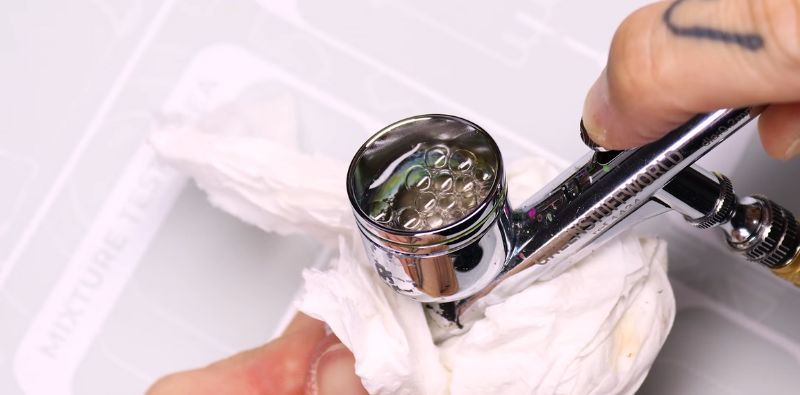
1. Cleaning between color changes. It is not necessary to completely disassemble it every time you change shade. It is enough to empty the tank, rinse it with water, and then rinse with a specific Airbrush Cleaner until the stream comes out totally transparent. An essential trick is "backflushing." This will force the air to return to the tank, creating bubbles that will dislodge the pigment remains accumulated in the needle channel.
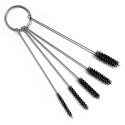
2. Deep cleaning at the end of the session: At the end of the day, remove the needle with extreme care, always pulling forward (so as not to drag paint towards the rear mechanism). Clean the needle with a cloth moistened in cleaner and use precision brushes for the airbrush body. Never force the needle when reassembling it; if you feel resistance, it is because there is still dirt. Incorrect assembly can widen the nozzle, which will destroy the airbrush's ability to perform fine details.
Both types of cleaning are explained in detail in our article “How to clean an airbrush?”
In the end, making the jump to airbrushing is a learning journey that requires patience and perseverance. Every technical detail adds up to increase the final quality of the works. Now that you possess the necessary information and know how to use an airbrush, you have only one step left: put everything you have learned into practice. Remember that at Green Stuff World we are passionate about detail and therefore we have a wide range of compressors, thinners, and airbrushing accessories for your transition to this tool.
Share this content