What are 3D special effects for miniatures and wargames?
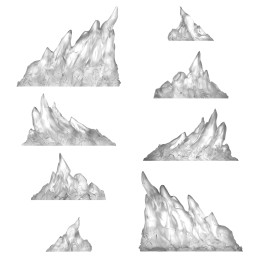
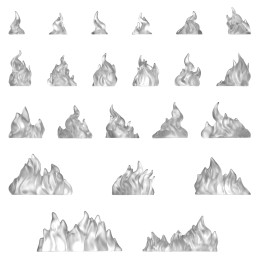
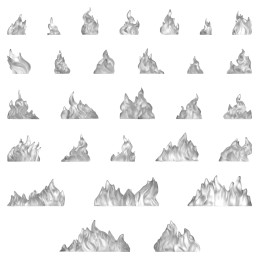
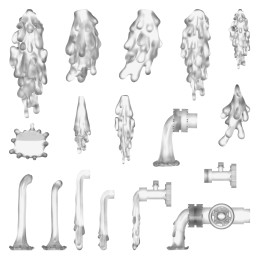
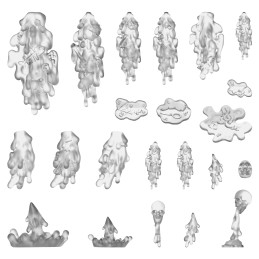
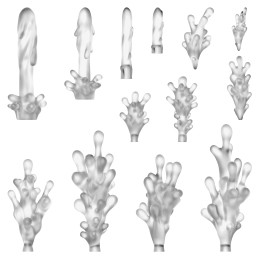
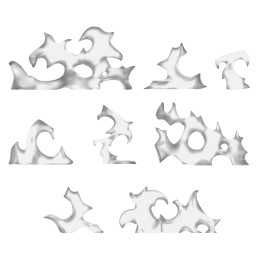
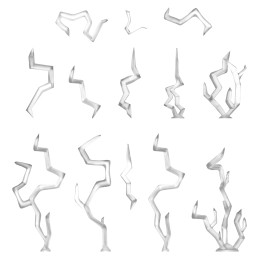
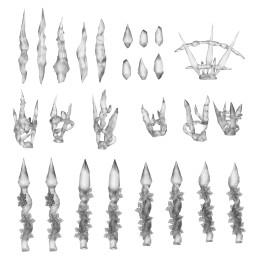
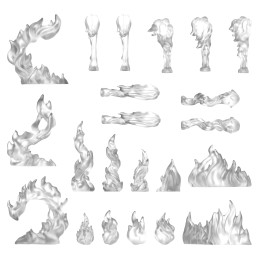
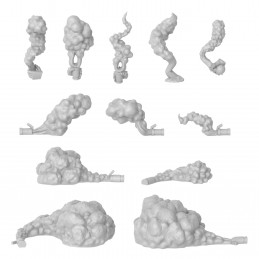
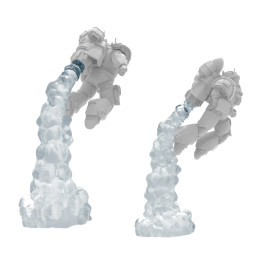
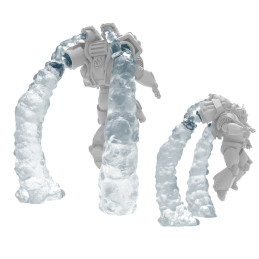
3D special effects are intricately designed resin bits manufactured using 3D printing technology and they include muzzle flashes, fireballs, magic effects, energy shields, and weapon effects, among others. They are crafted to add realism and dynamism to hobbyist projects, enhancing visual storytelling and creating immersive experiences for viewers.
Here are some popular miniatures games where special effects can be used, along with specific characters who could utilize them:
- Warhammer 40,000® (40K®): Use them for example in Space Marine Librarian which could utilize magic effects for casting powerful psychic abilities, such as summoning fireballs or creating Warhammer 40k® shields to protect allies.
- Warhammer Age of Sigmar®: Use compatible Warhammer® effects for miniatures 3D for example in a Stormcast Eternals Lord-Celestant which could wield flames coming out of his sword to enhance the power of their celestial weapons, unleashing fiery strikes or imbuing them with elemental energies.
- Star Wars: Legion: Use them for example in a Jedi Knight which could utilize energy shields to deflect blaster fire or summon Force-enhanced fireballs to devastate enemy troops.
- Infinity: Use special effects for miniatures 3D for example in an Aleph Myrmidon could deploy energy shields to protect itself and allies from incoming attacks or unleash advanced technological weapon effect to neutralize enemy threats.
- Warhammer Fantasy Battles (updated to Warhammer Old World® from 2024 on): Use them for example in a Wizard Lord which could conjure magical fireballs to rain down upon enemy units or erect energy shields to protect their forces from incoming projectiles.
- Malifaux: Use spell effects for example in a Guild Witch Hunter which could utilize mystical fireballs to purge heretical foes or deploy energy shields to withstand attacks from dark creatures.
- Warmachine/Hordes: Use them for example in Cygnaran Warcaster which could harness the power of arcane energy to unleash devastating attacks, such as explosive blasts or electrified attacks.
- Necromunda®: Use 3D special effects for miniatures for example in a Hive Gang Ganger which could use makeshift weapon effects, such as Molotov cocktails or makeshift energy shields crafted from scavenged technology, to gain an advantage in the under hive skirmishes.
- A Song of Ice & Fire, the tabletop miniatures game: Use them for example in Stark Hero character which could employ elemental fireballs to rout Lannister forces or utilize enchanted shields to bolster the defense of their troops on the battlefield.
In each of these games, they add an extra layer of strategy and thematic immersion, allowing players to customize their miniatures and miniature bases and bring their favorite characters to life on the tabletop.
What types of weapon effects and battlefx are available for miniatures and scale models?
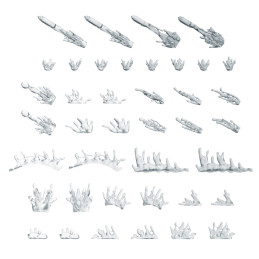
A wide variety of weapon effects and many others are available for miniatures games, catering to various themes, genres, and preferences. Some popular options include muzzle flash effect and plasma flashes for weaponry, fireballs and explosions for force powers, explosive and magic effects for mystical themes, compatible Warhammer 40k® shield, energy shields for futuristic settings, and finally weapon effects for adding realism to miniature weaponry. They add dynamic elements to projects, enhancing their visual appeal and storytelling potential.
What are the advantages of buying already 3D-printed compatible Warhammer® effects compared to printing yourself?
Purchasing already 3D printed compatible Warhammer® effects and Battlefx offers several advantages over printing them yourself. Firstly, it saves time and effort, as you don't have to worry about the complexities of 3D printing and post-processing.
List of advantages:
- Time Savings: Purchasing pre-made 3D-printed special effects saves you the time and effort required to design, print, and post-process them yourself. This is especially beneficial if you have limited time available for hobby projects or if you're working on multiple projects simultaneously.
- Consistent Quality: Reputable manufacturers like Green Stuff World ensure consistent quality in their 3D-printed special effects and battlefx. By buying from trusted sources, you can expect high-quality results without the variability that may come with DIY printing, such as printer calibration issues or filament inconsistencies.
- Reduced Learning Curve: 3D printing can have a steep learning curve, especially for beginners. By purchasing pre-made special effects resin bits, you can bypass the need to learn about 3D modeling, slicing software, and printer operation, allowing you to focus on other aspects of your hobby.
- Professional Results: Pre-made battle fx often have professional-level detailing and finish, providing a polished look to your miniatures or dioramas. This can be particularly advantageous if you're aiming for display-quality results or if you're showcasing your work in competitions or exhibitions.
- Access to Specialized Designs: Buying from reputable manufacturers like Green Stuff World ensures high-quality results and consistent detailing, eliminating the risk of errors or subpar prints. While printing yourself may seem cost-effective initially, factoring in the cost of materials, printer maintenance, and time spent on printing and troubleshooting, purchasing pre-made resin bits can be a more economical and convenient option in the long run.
- Convenience: Buying pre-made pieces is convenient and hassle-free. You can simply browse online stores, select what you want, and have them delivered to your doorstep without the need to set up and maintain a 3D printer or source materials and supplies.
- Cost-Effectiveness: While the upfront cost of purchasing battlefx may seem higher than DIY printing, it can be more cost-effective in the long run when you consider factors such as printer maintenance, filament costs, and the value of your time spent on printing and post-processing.
How do these resin bits enhance your miniature games?
These battlefx resin bits serve as transformative elements in miniature games, adding depth, detail, and character to game pieces. Whether it's adding muzzle flash effect to miniature weaponry, fireballs for explosive effects, or energy shields and compatible Warhammer 40k® shield for futuristic settings, they enhance the overall aesthetic and narrative of the game.
They engage players and bring game scenarios to life, elevating the gaming experience to new levels of excitement and immersion.
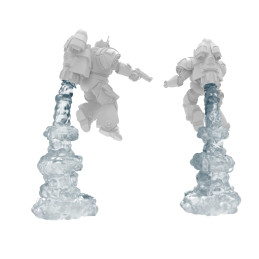
If these pieces are manufactured in transparent resin, they can be illuminated with LED lights inside to increase realism. For example, imagine the Emperor from Star Wars throwing lightning bolts through his hands completely illuminated with blue energy. Or an ultramarine primarch firing his weapon with a muzzle flash simulating that he is opening fire.
How can beginners incorporate 3D-printed special effects into their projects?
For beginners, incorporating battle fx into projects can be a rewarding and enjoyable experience. Start by experimenting with basic designs and gradually explore more complex ones as skills develop. Online tutorials, forums, and communities provide valuable resources and support for learning the basics of incorporating them into your miniature customizations.
Additionally, consider the scale and theme of the project when choosing which one to use, and carefully plan their placement for maximum impact. Experimenting with different painting and weathering techniques, with special attention to fluorescent paints, can further enhance the realism and integrate them seamlessly into the overall project. Adding a special resin-printed effect to your miniatures can elevate their appearance and bring them to life on the tabletop.
Here's a step-by-step procedure for incorporating these effects into your miniatures with ease:
- Prepare Your Miniature: Ensure that both your miniature and the compatible Warhammer bits from Green Stuff World are clean and free from any dust or debris. This will help ensure a smooth and seamless attachment.
- Inspect the Resin Piece: Take a close look at the resin piece and locate the small hole in the union part. This hole is designed to accommodate a small brass bar of 0.5mm or 1mm, or even a piece of wire. This feature is crucial for anchoring the resin piece securely to the barrel of the gun or arm of the miniature and creating a realistic gunshot muzzle flash.
- Select the pinning material: Depending on the size of the hole in the resin piece, choose an appropriate anchoring material such as a brass bar or a piece of wire. Ensure that the selected material fits snugly into the hole without causing any damage to the resin piece.
- Prepare the pinning: If necessary, cut the brass bar or wire to the desired length using appropriate tools. Make sure that the length of the anchoring material is sufficient to securely attach the resin piece of special effects to the miniature without protruding excessively.
- Insert the Pinning bar: Carefully insert the brass bar or wire into the pre-made hole, ensuring that it sits flush with the surface. If needed, use a small amount of cyanoacrylate glue to secure the pinning material in place.
- Position on the Miniature: Determine the desired placement of the resin piece on the miniature, taking into account factors such as the pose of the miniature and the direction of the firing direction (e.g., muzzle flash, energy blast).
- Attach: Once the positioning is finalized, carefully press the resin piece onto the miniature, ensuring that the anchoring material makes contact with the intended surface (e.g., barrel of the gun, arm of the miniature). Apply gentle pressure to ensure a secure bond between the resin piece and the miniature.
- Final Touches: Once it is securely attached, inspect the miniature for any gaps or imperfections around the attachment point. Use modeling putty or filler to fill any gaps and ensure a smooth transition between the resin piece and the miniature.
Where can enthusiasts find high-quality 3D-printed special effects for their projects?
Modelers and Warhammer® players can find high-quality 3D-printed special effects from reputable manufacturers like Green Stuff World. Other online stores specializing in hobbyist supplies reselling Green Stuff World products may also offer them ensuring premium quality and compatibility with various project themes and scales.
How to illuminate a shooting effect with LED lights and conductive paint?
To illuminate a shooting effect with LED lights and conductive paint, follow these steps:
- Gather Materials: Collect the necessary materials, including LED lights (preferably small and battery-powered), conductive paint, a small paintbrush, a scale model where you want to install them to enhance its realism, and any additional hobby tools like pliers or scissors if needed.
- Prepare the Model: Ensure that it is clean and free from any dust or debris. Identify the area where you want to add the shooting effect, such as the muzzle of a gun or the tip of a magic wand.
- Plan LED Placement: Decide where you want to place the LED lights. For example, if simulating a muzzle flash effect, the LED could be positioned inside the barrel of the gun.
- Paint Conductive Path: Use acrylic paint to create a path from the LED to the desired area of illumination. Carefully apply the conductive paint in a thin, even layer, ensuring that the path is continuous and does not have any breaks or gaps. This path will allow the electricity from the LED to reach the desired location.
- Install LED Lights: Once the paint has dried, insert the LED lights into their designated positions. Ensure that the positive and negative terminals of the LED are correctly aligned with the conductive path.
- Connect LED to Power Source: If using battery-powered LED lights, connect the positive and negative terminals of the LED to the corresponding terminals of the battery or power source. If necessary, use soldering equipment to create secure connections.
- Test the Illumination: Turn on the power source to test the illumination of the LED lights. Ensure that the lights are functioning correctly and that the desired area of the miniature or diorama is adequately illuminated.
- Secure Wiring: Once satisfied with the illumination, secure any exposed wiring or connections to prevent accidental damage or interference with the miniature or diorama.
- Fine-tune and Adjust: Fine-tune the position and brightness of the LED lights as needed to achieve the desired effect. You may need to adjust the angle or intensity of the lights to create the most realistic and visually appealing illumination.
- Finish and Seal: Once everything is in place, seal the paint and wiring with a clear varnish or sealant to protect against wear and tear and ensure longevity.
By following these steps, you can effectively illuminate shooting effects with LED lights and conductive paint, adding an extra level of realism and excitement to your miniatures or dioramas.
Warhammer®, Warhammer 40k®, Warhammer 40,000®, space Marine®, Warhammer Age of Sigmar®, Warhammer Old World®, Necromunda®, and 40k® are registered trademarks of Games Workshop Limited. The products offered are not affiliated with, authorized by, or endorsed by Games Workshop. Green Stuff World only manufactures and markets compatible products designed for use with these and other miniature lines.