Reference: 8435646501550ES
Brand: Green Stuff World
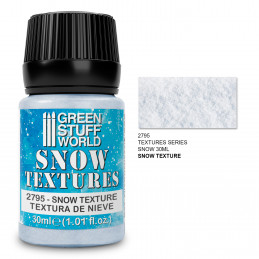
Snow Textures - SNOW 30ml
Review(s): 4
Snow Textures Serie
Price €3.95
In stock


There are 9 products.
Reference: 8435646501550ES
Brand: Green Stuff World
Snow Textures Serie
Reference: 8435646504964ES
Brand: Green Stuff World
Snow Textures Serie
Reference: 8435646507910ES
Brand: Green Stuff World
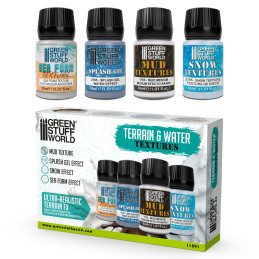
A set of texturing pastes to customize and bring your miniatures, models, and dioramas to life.
Reference: 8435646529776ES
Brand: Green Stuff World
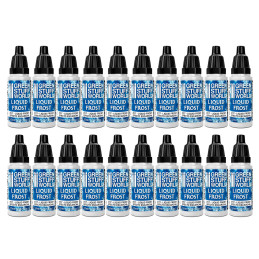
Liquid frost is a crystallizing solution for creating frost effects.
Reference: 8435646508351ES
Brand: Green Stuff World
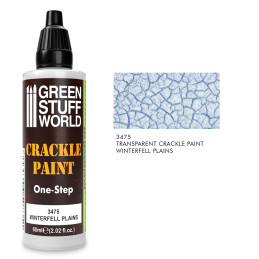
A unique product that will create amazing cracks.
Reference: 8435646511382ES
Brand: Green Stuff World
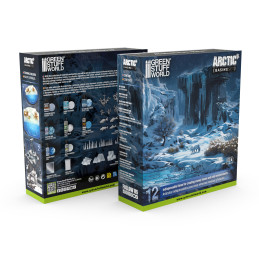
Basing Sets - Arctic | Snowy Environment Set
Reference: 8435646506906ES
Brand: Green Stuff World
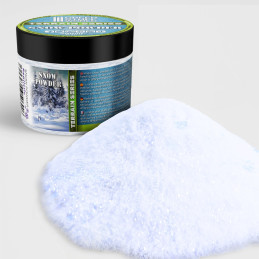
Model SNOW Powder 200ml
Reference: 8435646506890ES
Brand: Green Stuff World
Model SNOW Powder
Reference: 8436574504767ES
Brand: Green Stuff World
Liquid frost Green Stuff World is a crystallizing solution for creating frost effects.
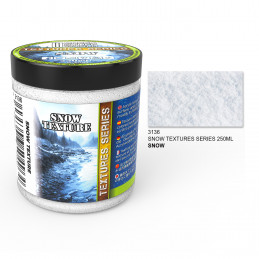
Textured snow in dioramas and scale models are essential for creating a realistic wintry environment. They add depth, detail, and a sense of coldness to the miniature scene, enhancing the overall visual impact. There are various approaches to achieving convincing textures in diorama modeling.
Although they could be homemade with different possible results, they are sold mixed and ready for application in 30ml and 250ml formats.
They are used to recreate the appearance and characteristics in a realistic and detailed manner. They are applied to models such as buildings, landscapes, vehicles, and figures to evoke a wintry atmosphere and enhance the overall visual appeal.
The purpose of artificial snow textures is to capture the unique qualities of realistic snow, such as its softness, brightness, and ability to transform landscapes. By incorporating it, modelers can convey the coldness, depth, and intricacies of a snowy environment, creating a sense of realism and immersion in their dioramas or scale models.
This effect can be achieved through various methods and materials, depending on the desired effect and scale. Some common techniques include:
The choice of the realistic model snow textured method depends on the scale of the model, the desired level of realism, and personal artistic preference. Experimentation with different techniques, materials, and products can help achieve the desired effect.
Overall, textured snow for craft, modeling dioramas, and scale models allows artists to replicate the charm and beauty of winter landscapes. They add an essential element to the scene, capturing the winter essence and contributing to the overall visual storytelling of the model.
At the same time, we have available an arctic basing set which is a comprehensive collection of materials, hobby paints, and accessories designed to help you create realistic snowy and frozen terrains for your scale models or dioramas. Whether you're a beginner or an experienced hobbyist, this set provides everything you need to bring your Arctic-themed scene to life.
Creating textured paint at home is easily possible if you have the right materials.
The most important thing is the medium or acrylic base that you are going to use as a binder. If you choose PVA glue it will eventually lose some of its whiteness as all PVA-based adhesives eventually dry out.
The best substitute as a binder would be the Medium Decoupage which is available in large jars of 250ml. You have to choose the most suitable finish according to what you are looking for at the end, between Matte, Satin, or Gloss. For this effect, the best is a satin medium position.
Once you have the binder, then you only need the white filler. For this function, we are going to recommend our product in powder which is available in 2 formats normal or realistic. The difference between the two is that the latter has very realistic glitters that replicate nature.
You can play with the density by adding a little clean water to the mixture and sprinkling the powder before drying.
Just follow these steps:
With these steps, you can create a beautiful winter diorama, bringing a wintry ambiance and a touch of magic to your miniature scene.
Snow textured paint is a very specialized product used, above all, in the construction of models, miniature figures, and dioramas to recreate a winter situation. There are not many stores that sell this type of item, but there are still several options where to look for it:
We have all the varieties that an artist may need: frost effect paint, transparent crackle paint, textured paste, frost effect liquid frost, artificial snowflakes, and, as an extra, an artic basing set that includes everything you need to create a realistic cold space. With this wide range of items, we want to adapt to the needs of each of our customers while facilitating access to any product in this sector.
Discover also our paint mat.