Reference: 8436574504040ES
Brand: Green Stuff World
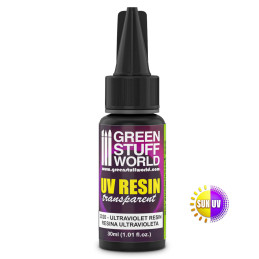
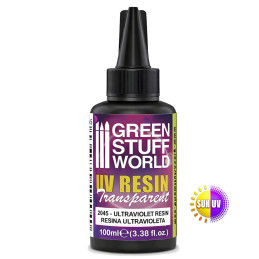
UV Resin 100ml - Water Effect
Review(s): 2
UV Resin 100ml - Water Effect
Price €22.00
In stock


There are 6 products.
Reference: 8436574504040ES
Brand: Green Stuff World
UV Resin 100ml - Water Effect
Reference: 8436574503791ES
Brand: Green Stuff World
UV Resin 30ml - Water Effect
Reference: 8436574503784ES
Brand: Green Stuff World
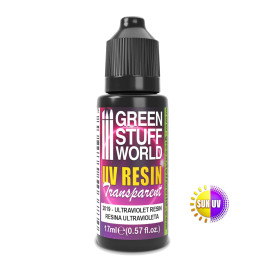
UV Resin 17ml - Water Effect
Reference: 8436574504538ES
Brand: Green Stuff World
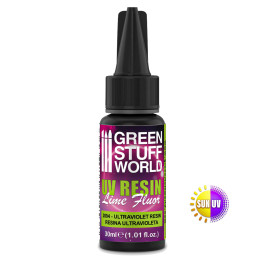
UV Resin 30ml - Fluor Toxic Effect
Reference: 8436574507430ES
Brand: Green Stuff World
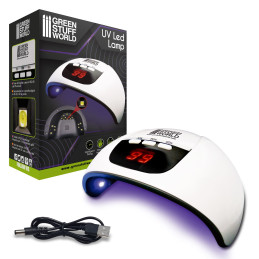
Arched ultraviolet LED Lamp for curing resins and fluorescent paint.
Reference: 8436574502688ES
Brand: Green Stuff World
Ultraviolet Torch | UV torch
UV resin or Ultraviolet resin is a type of one-component synthetic photopolymer resin known for its ability to cure rapidly when exposed to ultraviolet light or direct sunlight. Presented in transparent liquid form, it is characterized by its direct application from the container, without mixing components, and its ability to mimic the appearance of glass upon curing. Because of its ability to cure in minutes under the UV lamp, it has become a popular product in arts and crafts. In addition, it allows encapsulation of objects and working in layers.
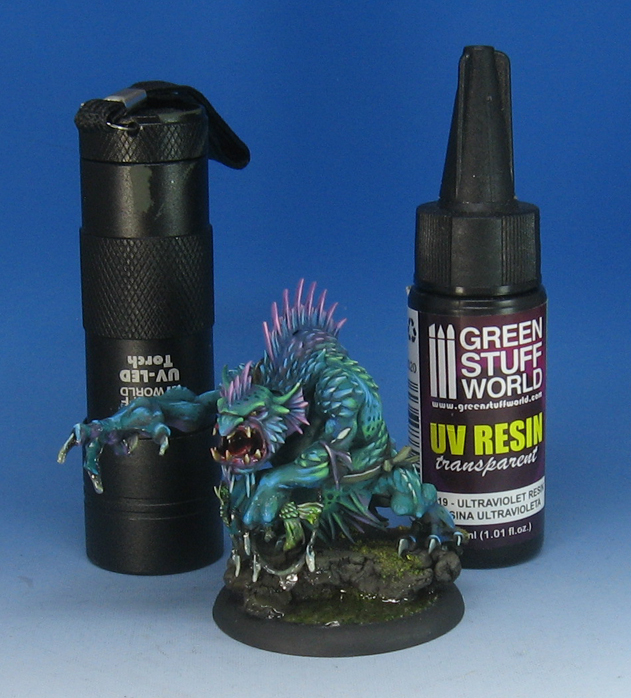
It is a must for our wargames and miniatures. It is perfect for artists and modelers who want to look for realistic ways to create water effects or toxic effects in their dioramas. They usually create a water effect of pure transparency, but there is also a fluor version that creates a fluorescent effect with a unique glow-in-the-dark result when approached with a ultraviolet flashlight.
It has a gel-like viscosity and is applied directly to the base of the miniature. It has an ultra-fast drying time when combined with an ultraviolet flashlight, taking between two and four minutes.
It should be noted that it will remain in a liquid state permanently until ultraviolet light or daylight hits it. While that happens, you can spread and rectify its application as needed. Once the desired shape is achieved, apply light on it to dry it completely and harden it. If after doing this you notice that it remains sticky to the touch, it is because there has been a problem with the ultraviolet light, either because of the amount or the intensity of the light. If the flashlight has very low batteries or if the flashlight is very dirty it could directly affect the curing.
It is advisable to apply a gloss varnish once it has dried as it gives a more striking effect to the original color generating more visual transparency as well as eliminating the sticky effect when it is not completely cured.
This product does not have to be mixed with any other component to harden, only ultraviolet light should be used. Sun curing is also possible and will take 5 to 10 minutes on a sunny day. This time is reduced to between 90 and 240 seconds by applying curing light. It can be tinted with different dyes available on the Green Stuff World website.
Using UV resin is straightforward and suitable for a variety of creative projects, including jewelry making, encapsulating objects, and crafting detailed decorations. Here’s a simple guide on how to use it effectively:
This process allows for rapid project completion and offers significant creative flexibility due to the quick curing time.
UV resin, like many synthetic chemicals, contains chemicals that can be hazardous before they are cured. Its toxicity primarily concerns its uncured state, when it can release fumes that might be irritating to the skin, eyes, and respiratory system. These fumes are due to the presence of volatile organic compounds (VOCs).
Both the odor and toxicity levels are lower than traditional methods, making it more comfortable and pleasant to use. Although its use indoors is not potentially dangerous, it is necessary to maintain some precautionary measures during the process.
Before starting to work with this product, be sure to be in a ventilated area, as it can give off vapors during the curing process. In addition, to avoid direct contact, it is necessary to wear nitrile gloves and, if the context requires it, even protective goggles and a 3M respirator mask.
Once fully cured, It is generally considered safe and non-toxic, as the chemical compounds have reacted to form a stable, inert polymer. However, it's essential to handle and use this product in a well-ventilated area to minimize exposure to any harmful fumes. Additionally, wearing protective gloves and, in some cases, a mask or respirator is recommended, especially when working with large quantities or in less ventilated spaces.
Finally, the handling of this type of material should be done away from children or pets to protect them from possible splashes of the product, and it should be stored in a place that is difficult for them to access.
Its curing time can vary depending on several factors, but generally, it cures very quickly when exposed to ultraviolet light. Under a UV lamp, It takes about 2 to 5 minutes to cure completely. This time can be slightly longer or shorter based on the intensity and wavelength of the light source, as well as the thickness of the application.
When using sunlight the time required can also vary. On a sunny day, it might take approximately 5 to 10 minutes to fully cure. However, on cloudy days or in less direct sunlight, the curing process can take significantly longer.
It’s essential to ensure that it is exposed evenly to the light to achieve a consistent and thorough cure. Incomplete curing might leave the surface tacky or soft, which is a common issue if the exposure is insufficient. For optimal results, always follow the manufacturer’s guidelines regarding the recommended curing times and conditions.
Coloring UV resin is a fairly simple process as it is thermosetting and does not need to be mixed to cure, unlike epoxy resin. To do it, it is only necessary to have a specific dye for this material of the desired color, available on the Green Stuff World website. The steps to color it are as follows:
The process of choosing the dye is vital for an optimal finish. It mustn't contain alcohol, because alcohol produces a chemical reaction with which it will lose several of its properties. Therefore, the best option is always to use the dyes offered by the same brand.
UV resin, once cured, is typically considered non-toxic, meaning it doesn't release harmful chemicals. However, being non-toxic does not automatically qualify it as food-safe. The term "food-safe" refers to materials that are safe to come into direct contact with food without the risk of leaching chemicals into the food or otherwise contaminating it.
They are not normally certified as food-safe because they can potentially release substances into food or beverages, especially when subjected to certain conditions like heat or acidity. For projects that involve direct contact with food, such as making coasters, trays, or other items that might come into contact with food or drink, it is crucial to use a product that is specifically labeled as food-safe.
If you are working on a project that requires food safety, look for something that have been tested and approved according to food safety regulations, often indicated by FDA approval for direct food contact. These products undergo rigorous testing to ensure they do not contain harmful substances that could migrate into food.
If your ultraviolet resin is sticky after curing, it indicates that it has not been fully cured. This issue can arise from a few different factors:
To remedy sticky resin, try exposing it to ultraviolet light for a longer period, or consider using a stronger light source. If certain areas are under-cured, additional focused exposure might be needed. For future projects, ensure even light coverage and appropriate curing times based on the application depth and the type of additives or pigment added.
A quick solution is to use an acrylic gloss varnish to cover these sticky areas that are not fully cured. The varnish will dry quickly creating a protective barrier on top of the sticky area, completely eliminating the problem.
UV resin works exceptionally well with silicone molds, making it a popular choice among crafters and hobbyists. Silicone molds are highly favored for their non-stick qualities, which significantly ease the demolding process. The flexibility of these molds allows for the gentle removal of fully cured pieces without damage to the delicate details or the mold itself. This feature is especially beneficial when creating intricate designs or thin, fragile pieces that might otherwise snap or break when extracted from more rigid materials.
Another advantage of using silicone molds is their durability. Silicone withstands its chemical components and the light exposure needed for curing without degrading. This resilience makes silicone molds a cost-effective option for repeated use in casting, ensuring that each project turns out as smooth and detailed as the last.
When casting using silicone molds, it’s crucial to ensure the mold is impeccably clean and free from any dust or particles. Even minor imperfections can be transferred from the mold to the finished product, so taking the time to properly prepare your mold before use will help achieve the best possible results in your crafting projects.
It is extensively used in various creative and industrial applications due to its rapid curing time and ease of use. It is particularly popular in jewelry making, where it is used to create pendants, bracelets, and earrings because it can quickly encapsulate small objects like flowers, glitter, and beads with a clear, glossy finish.
Crafters also use it in making keychains, coasters, and other decorative items. In fine arts, it serves as a protective coating for paintings and photos, enhancing their colors and protecting them from moisture and wear. Additionally, It is utilized in DIY home decor projects, where it can be used to make custom table tops or to repair glass and plastic items. Its ability to cure quickly under UV light makes it ideal for projects that require a fast turnaround.
Over-curing UV resin is possible and can affect the physical properties of the final product. While It normally cures within minutes, exposing it for an extended period can lead to yellowing and brittleness.
This happens because the light continues to break down the chemical structure, which can degrade its quality and reduce its clarity and luster. Over-curing it can also make it to become less effective at protecting encapsulated objects.
Yes, you can use alcohol ink in UV resin to add vibrant colors and create unique effects. Alcohol ink mixes well and can be used to achieve various artistic designs such as wispy, smoke-like effects and intense color saturation.
When using alcohol ink, it's important to add it sparingly and gradually to control the intensity and distribution of color. Keep in mind that alcohol ink can affect the curing process, so it's advisable to experiment with small batches first to ensure it still cures properly and achieves the desired finish. Additionally, the inks may react differently with different brands, so testing is crucial.
Polishing UV resin is a great way to enhance its clarity and shine after it has cured. Start by sanding its surface with progressively finer grits of wet sandpaper, beginning with a coarse grit (like 400) to remove any major imperfections or uneven surfaces, and gradually moving to finer grits (up to 2000) for a smooth finish.
After sanding, use a polishing compound and a soft cloth or a buffing wheel to polish the surface to a high shine. For the best results, apply a plastic polish to the surface and buff it until it reaches the desired level of gloss. This process not only improves its aesthetic but also helps to protect its surface from minor scratches and abrasions.
It does have a shelf life and can expire. It can last for about six months to one year when stored properly. The shelf life can be affected by factors such as exposure to air, heat, and of course, direct sunlight.
Once expired, It may become difficult to cure properly and can develop a yellow tint. To maximize the lifespan, store it in a cool, dark place and ensure the container is tightly sealed to prevent exposure to air and moisture. Always check the expiration date provided by the manufacturer before use to ensure optimal performance.
Cleaning UV resin from tools and work surfaces involves a few steps, especially when the product is still uncured. Isopropyl alcohol is effective for cleaning uncured parts; simply apply it to a cloth or paper towel and wipe the surfaces clean. For tools like brushes or spatulas, soaking them in alcohol for a few minutes before wiping can help remove them more effectively.
If it has been cured, mechanical removal might be necessary, as it is very hard and resistant to chemicals. Using a razor blade or a similar tool can help scrape off cured remains, but care must be taken to avoid damage to the underlying surfaces. Regular cleaning of tools and areas where it is used not only maintains a clean working environment but also extends the life of your tools.
When selecting this product for a project it is important to know that it has the necessary characteristics to obtain the desired results, since from one manufacturer to another there can be a big difference. To choose the best UV resin it is necessary to consider qualities such as:
If you are looking for the best UV resin on the market, that meets all the characteristics of a versatile and quality product, take a look at our catalog, where you can find one of the best UV resins in the industry, which leaves no one indifferent. In fact, in Green Stuff World we have a wide variety so you can find the one that best suits your project without having to worry about painting it or giving it the most suitable look for your miniature.
There are several techniques to make jewelry using UV resin. The first thing to consider is whether or not to use a mold. This will depend on the type of jewelry you want to make and the materials you will use. In addition, it is essential to differentiate between Exposy resin and ultraviolet, since both are used in this sector. They are easily recognizable: the first one is a compound of two substances, that is to say, it is necessary to make a mixture to be able to work with the product. The second is ready to be used and needs to be cured under ultraviolet light.
Jewelry using molds
To make this type of jewelry you will need specific materials and utensils for this purpose:
For this type of jewelry, we usually work in layers. The first one will be the base on which the decorative elements that will compose the design will be added. They can be small minerals, natural flowers, or sand to simulate a landscape, among many other elements. If the design is elaborate, the number of layers is usually greater, since each of the elements will be placed in a layer, curing between them. In the simplest designs, two layers may be enough, the first one to place the decorative elements and the second one to seal them completely and make sure they are completely covered. It is even possible to make very simple designs in a single layer.
It should be noted that you do not work in the same way on a mold as on a structure (it is not a mold as such but serves as a guide). The mold allows you to start working directly by adding the ultraviolet resin inside it, as it usually has a base that prevents the liquid from spreading on the working place. The structure of a jewel tends to consist only of a geometric shape with no top or bottom base, so a containment method will be needed to prevent the liquid from spilling. To solve this problem, it is recommended to acquire specific adhesive tape for this purpose, which is suitable for drying under ultraviolet light and allows it to be easily removed from the jewelry once it has dried.
Once the design is finished and the jewel is dry, it is time to unmold (if necessary) and polish the imperfections. This part is as easy as filing until it has the desired shape and without the unwanted imperfections. To improve the finish, a coat of glossy nail polish can be applied, or a thin layer of UV resin, the latter is useful to finish shaping the jewel made with structure and improve the surface that was attached to the ribbon.
Finally, when necessary, a small hole should be drilled to make it easier to attach the jewelry to a chain or clasp. To do this, use the mini hand drill, with which it is easy to open a hole by exerting a little pressure on the jewel. Now all that is left to do is to attach the relevant clasps.
Jewelry without molds
Jewelry without molds with ultraviolet resin is often used to make ornaments with flowers or natural leaves. In this case, the tools and materials needed will be similar:
The flowers or natural plants you want to use must be pressed, so this is the first step. Once pressed, place one of them on your work table and add UV resin to one of its sides, using the wooden sticks to spread it well over the entire surface and avoid using too much product. Make sure to spread it well before taking it to dry under the UV lamp. Now just repeat the process on the reverse side of the plant or flower. When it is completely covered by the product and completely dry, it is time to sand the imperfections of the edges and give it the final coat of glaze for a perfect finish, if necessary.
Now all that is left to do is to pierce the jewel with the mini hand drill to embed the clasps.
Not what you were looking for? You might be interested in our fluorescent paint, wet palette and our blackest black paint.
You can also check our dry paint brushes or drybrush texture paint.