- There are no more items in your cart
- Shipping
- Total €0.00
- Paint
- Model Paints
- Flexible Paints
- Auxiliary Paints
- Weathering and Pigments
- Water effects
- Miniature Paint Brushes
- Paint Accesories
- Texture paint
- Refillable paint pen
- Airbrushing
- Paint Rack
- Paint Spray
- Hobby Tools
- Hobby Tool Kit
- Modeling Tools
- Engraving tools
- Cutting Tools
- Texturing Tools
- Rolling Pins
- Static Grass Applicator
- Leaf Punches
- Photo Etched Tools
- Abrasive Products
- Thermoforming Machines
- Hobby Drill
- Modeling tweezers
- Clamps and Miniature Holders
- Putties and Materials
- Scenery and Resin
- Resin items
- Resin Busts and Figures
- Static Grass
- Grass Tufts
- Basing Sets
- Miniature Basing Materials
- Snow Modeling
- Hobby Sand
- Wargaming mats
- Wargaming Terrain
- Other Scenery
- Letters and Numbers for Modelling
- Photo Etched Model Parts
- Hobby Accessories
- Miniature bases
- Movement Trays
- Neodymium magnets
- Magnetic Sheet
- Modeling glue
- Wood bases
- Acrylic Display Blocks
- Lighting and electronics
- Miniature Carry Case
- Hobby Lamps
- Photography
- Board games
- Waterslide Decals
- Miniature Display Cases
- SteamPunk and Beads
- Cosplay shop
- Wholesaler
- 3D printers
- OUTLET Offers
- Merchandising
- New Products
FEP Film for 3D printers
Reference: 8435646504384ES
Brand: Green Stuff World
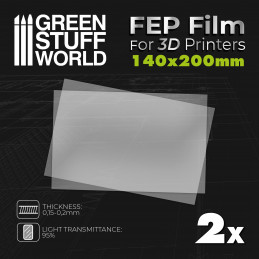
FEP film 200x140mm (pack x2)
Replacement FEP release film liner
What is an FEP film used for in 3D printers?
An FEP film is a type of material known as Fluorinated Ethylene Propylene film. It is commonly used in 3D printing, particularly in many desktop resin printers. They are valued materials for their excellent chemical resistance and non-stick properties, making them an ideal choice as release material in resin printing. Although there are several alternative options available, FEP sheets have become somewhat of a standard choice.
Where to buy FEP films?
To buy FEP films, you can find them from various sources online and in physical stores that specialize in 3D printing supplies. One reputable online option is Green Stuff World, which offers a wide range of 3D printing accessories, including a FEP sheet for 3d printer. Green Stuff World is known for its quality products and has a good reputation among hobbyists and professionals alike.
You can also take the opportunity to buy acrylic paints, modeling glue, and miniature paint brushes for painting in the same place.
When to change fep film in your 3D printer?
The way to know when to change fep film is whenever it becomes bent, deformed, or perforated during the printing or operation process. Maintaining a clean FEP film is crucial for allowing the UV light to properly cure the liquid abs-like resin throughout the entire printing procedure. If the film is damaged or worn out, successful prints may not be achieved.
How to replace a FEP film on a 3D Printer?
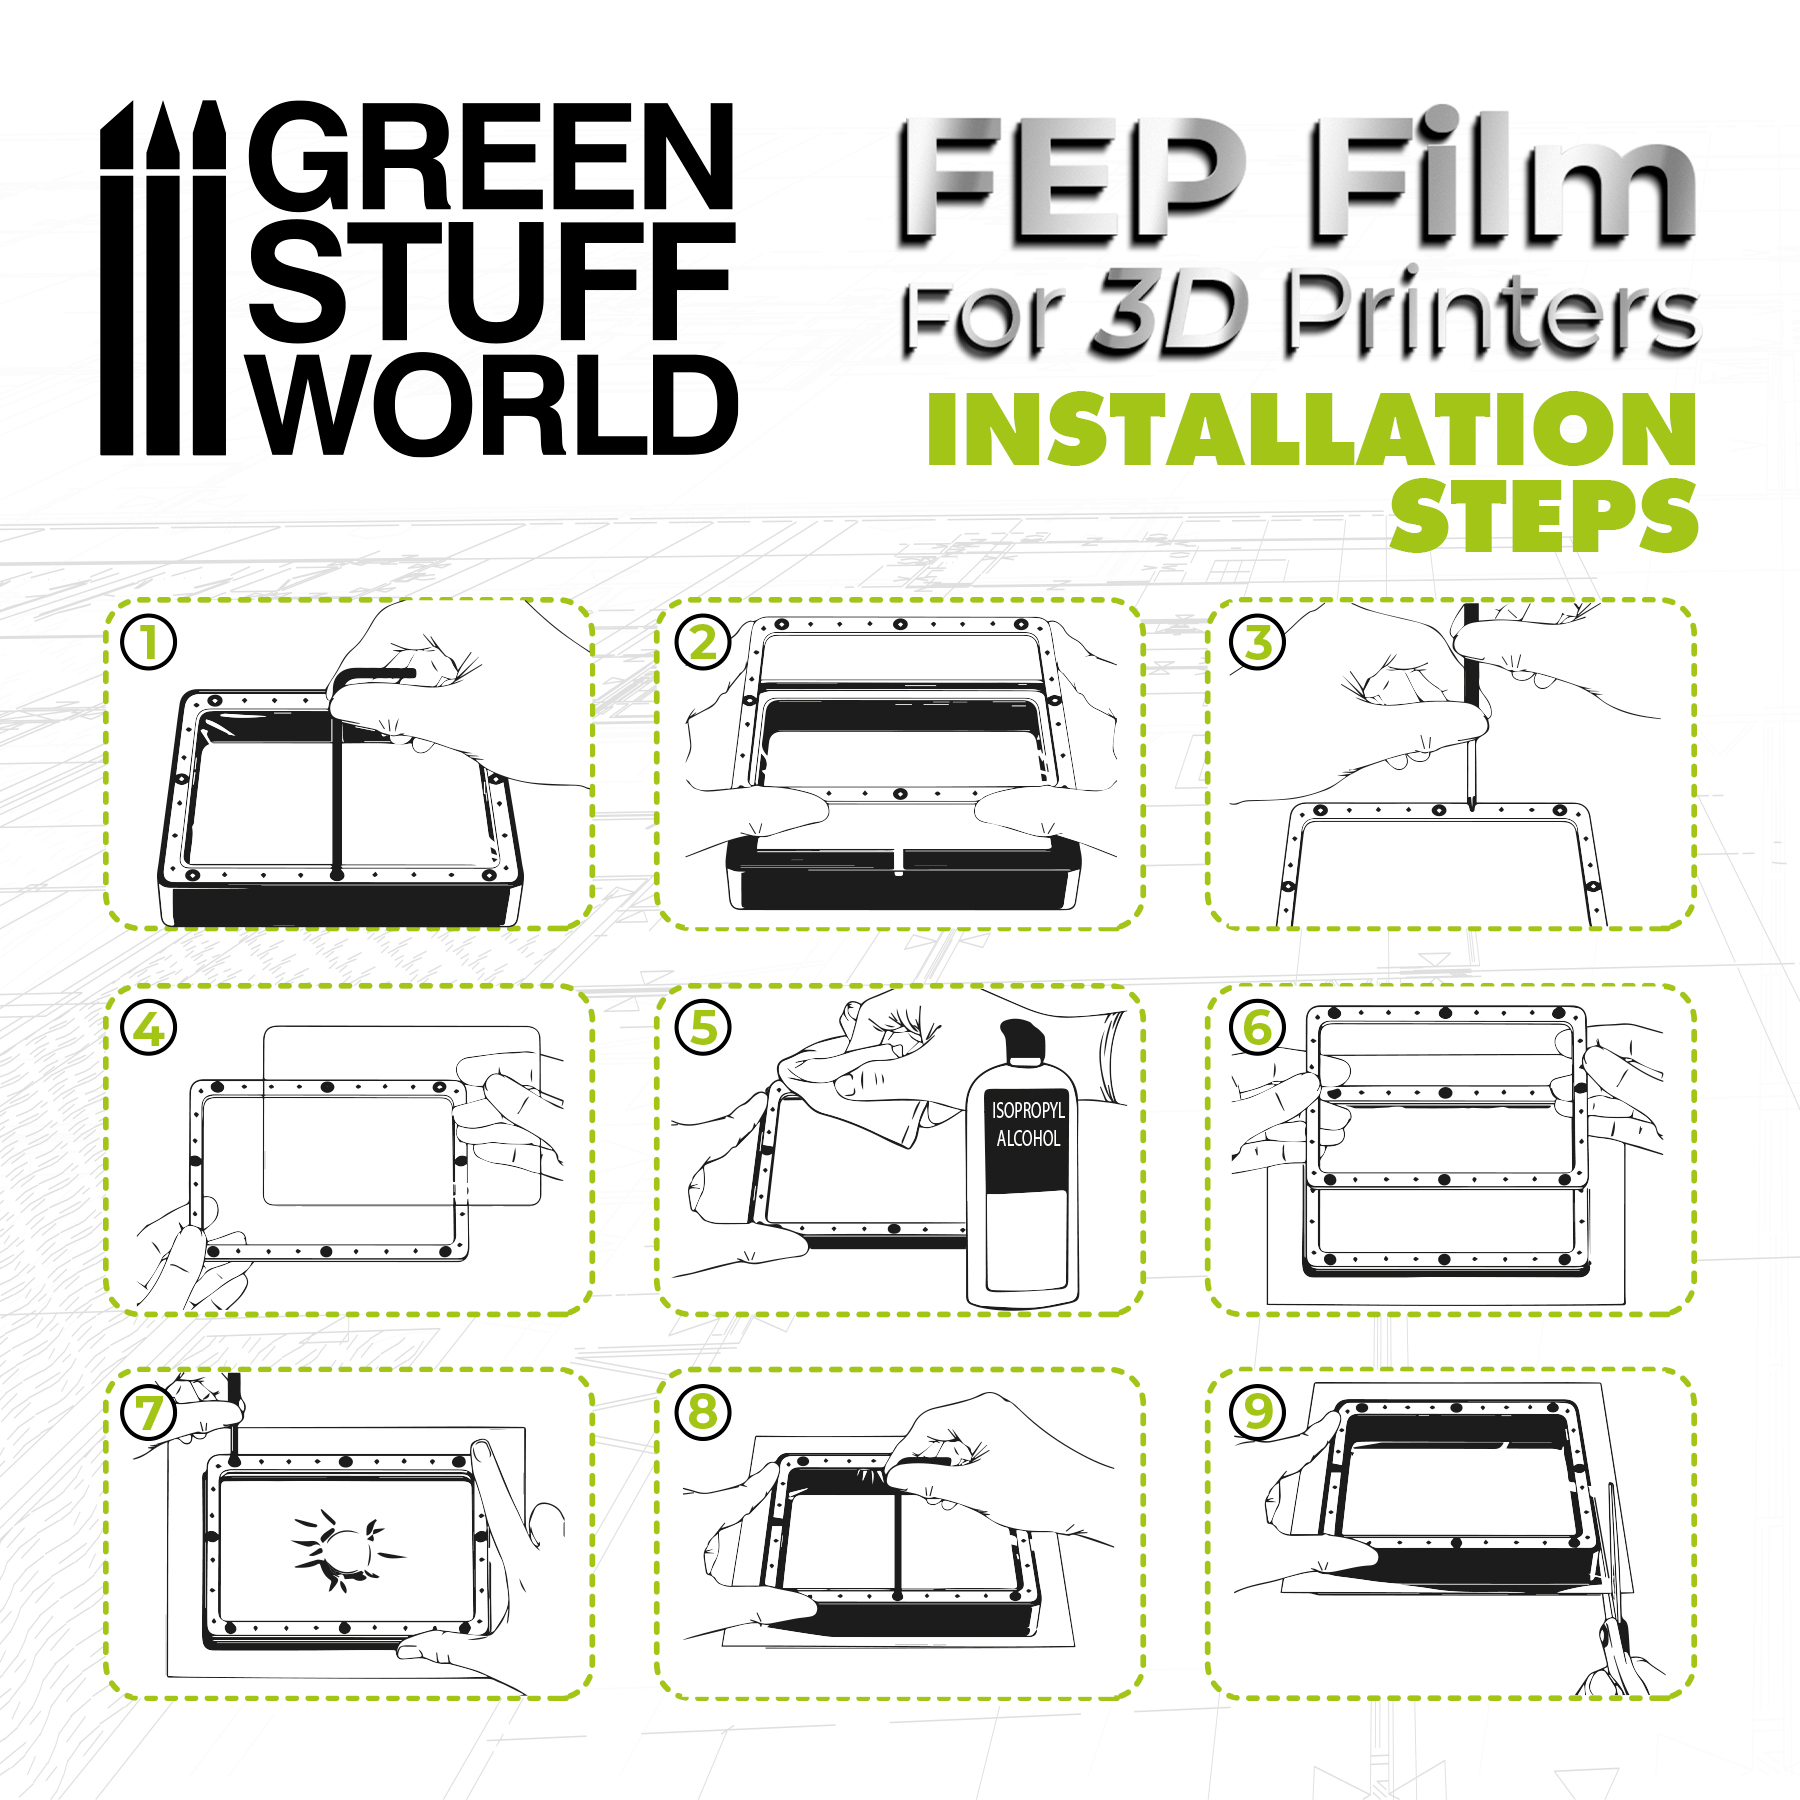
Replacing the transparent layer involves a straightforward process. Follow these nine steps to successfully replace it:
- Step 1: Using an Allen wrench, gently loosen all the screws on the resin tank. Flip the tank over and locate the darker-colored screws. Carefully unscrew each one using the Allen wrench and set them aside for later use. Be cautious not to misplace any screws, as they are essential for reassembling your resin tank.
- Step 2: Remove the metal plate located at the bottom of the resin tank. After unscrewing all the Allen wrench screws, carefully separate the metal plates from the plastic body of the resin tank. Keep the plastic part of the tank aside for later use.
- Step 3: With a screwdriver, take out all the remaining screws. Specifically, focus on the screws that hold the two metal frames together. Ensure you keep all these screws in a secure location to avoid misplacing them, as they will be needed for reassembling the resin tank later on.
- Step 4: Remove the old transparent plastic by popping it out. Begin by taking off the top metal frame, and then gently pull it away from the bottom frame. Dispose of the old transparent plastic as it will no longer be necessary. Clean the area to remove any debris or residue left behind. Ensure that the surface is smooth and free of any obstructions.
- Step 5: Utilize isopropyl alcohol to clean your resin tank thoroughly. As the tank is disassembled, this is an excellent opportunity to remove any lingering resin. Dab a clean towel with isopropyl alcohol and carefully wipe the metal frame and the interior of the plastic body of the tank to ensure a thorough cleaning.
- Step 6: Place the replacement plastic between the two metal tank pieces like a sandwich. Ensure that it is mostly centered between the two plates. Take the time to adjust it now if needed, as you won't have the opportunity to do so later on. Align the screw holes on the metal plates to ensure they are positioned correctly.
- Step 7: Position the replacement plastic and the metal frames on a small object, such as a bottle cap, to prevent excessive tension. Place the bottle cap on a flat surface like a table and center the metal frames with the film in between them over the bottle cap, creating a raised point. This setup causes a slight bulge ensuring it remains taut while connecting the metal frames.
- Step 8: Reassemble the metal pieces by using a screwdriver to insert the screws again. Gather the screws that were removed with the screwdriver, not the Allen wrench, and use them to connect the two metal frames together. Align their screw holes and use the screws to secure them. You might need to apply some force as you push the screws through the new replacement plastic. Keep a close eye on the film to ensure it remains taut even during the screw attachment process.
- Step 9: Finally, trim off the surplus of plastic using any hobby cutting tool. Hold the edges of the excess plastic in one hand and carefully slice them off with the box cutter. Trim the excess as close to the metal pieces as possible to ensure nothing protrudes. Now, you can reinsert your resin tank into the respective machine you were working on.

Are any FEP sheets suitable for use in 3D printers?
Yes, any of them that you come across will generally work well with most SLA (Stereolithography) printers. While some materials may exhibit variations in quality and performance, the majority of them will function properly. It is essential to consider the film's quality, but, in general, all of them are compatible with various 3D printers.
How many prints can you typically get from a single sheet?
Their lifespan varies depending on their condition and usage. Replacement becomes necessary when noticeable indications of wear and tear emerge, like deep scratches or punctures that result in frequent print failures. With proper care, some FEP sheets can endure around 20-30 prints without damage, but eventually, replacement becomes necessary.
Why is important transparency and stick properties?
The importance of transparency and non-stick properties lies in their role within 3D printing technology. Transparency is vital because it allows UV light to pass through the material unhindered. This unobstructed passage of light is crucial during the printing process, as it facilitates the proper curing of liquid resin, leading to accurate and successful prints.
On the other hand, non-stick properties prevent the printed objects from adhering to the material during the curing process. This anti-adhesive characteristic ensures that the finished prints can be easily removed from the surface without causing any damage or deformations.
Both transparency and non-stick properties are critical factors in enabling smooth and effective 3D printing, enhancing the overall quality and reliability of the process.
 Cookie preferences


