Reference: 8435646520681ES
Brand: Green Stuff World
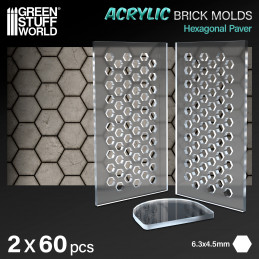
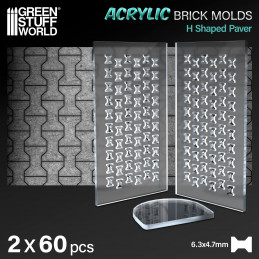
Acrylic molds - Octagon Paving Brick
Review(s): 0
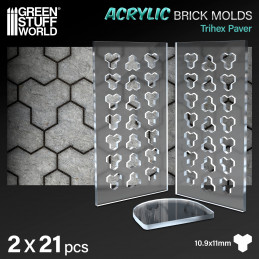
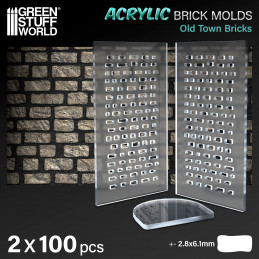
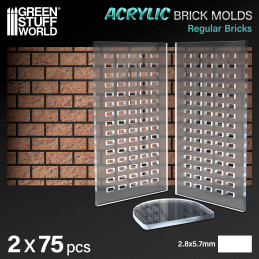
Methacrylate acrylic molds for making model bricks
Price €8.50 Regular price €10.00
In stock
There are 9 products.
Reference: 8435646520681ES
Brand: Green Stuff World
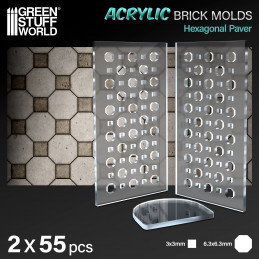
Methacrylate acrylic molds for making model bricks
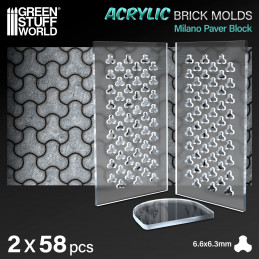
Reference: 8435646520674ES
Brand: Green Stuff World
Methacrylate acrylic molds for making model bricks
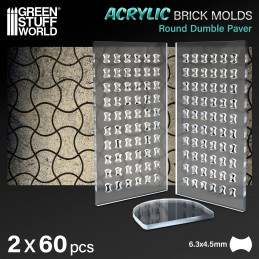
Reference: 8435646520636ES
Brand: Green Stuff World
Methacrylate acrylic molds for making model Round Dumble Paver
Reference: 8435646520667ES
Brand: Green Stuff World
Methacrylate acrylic molds for making model bricks
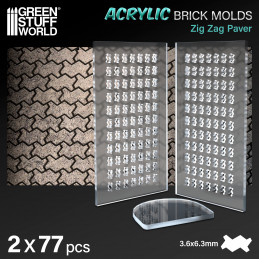
Reference: 8435646520629ES
Brand: Green Stuff World
Methacrylate acrylic molds for making model bricks
Reference: 8435646520643ES
Brand: Green Stuff World
Methacrylate acrylic molds for making model bricks
Reference: 8435646520650ES
Brand: Green Stuff World
Methacrylate acrylic molds for making model bricks
Reference: 8435646520612ES
Brand: Green Stuff World
Methacrylate acrylic molds for making model bricks
Reference: 8435646520605ES
Brand: Green Stuff World
Methacrylate acrylic molds for making model bricks
Methacrylate acrylic molds are a versatile tool in the world of miniature modeling and diorama crafting. At Green Stuff World, we've witnessed a surge in popularity for these molds, especially when used to create realistic bricks with air-drying putties.
Often referred to as simply acrylic molds, are transparent, durable, and versatile tools used to create intricate shapes, including bricks for miniature dioramas. Their popularity stems from their versatility, allowing crafters to produce uniform pieces with incredible detail and ease.
Unlike traditional silicone versions, these are clear, allowing crafters to see the placement of air-drying putties and ensure accurate results. They are also reusable, making them a cost-effective choice for long-term crafting projects.
Using them for crafting bricks is a relatively uncomplicated procedure, although it necessitates a degree of attentiveness to ensure optimal outcomes. Presented below is a stepwise instructions for using them:
Bear in mind the fragility and it lacks the flexibility of rubber or silicone molds and can fracture if subjected to bending.
The drying time can vary based on the type of putty used and environmental conditions. Typically, air-drying putties may take anywhere from a few hours to 24 hours to fully set. It's essential to allow the putty to dry completely before demolding to avoid any deformities. This type of material tends to shrink a very small percentage, which allows the copies to practically release themselves out.
How can I enhance their realism?
You can use additional tools, such as texture stamps or sculpting tools, to add details like texture and mortar lines. Additionally, painting and weathering techniques can give your miniature bricks an authentic appearance.
Can I reuse Methacrylate Acrylic Molds for multiple projects?
Yes, these tools have been designed to be reusable. After each use, clean them thoroughly to remove any remnants of putty and apply a mold release agent if necessary. Proper care can ensure longevity.
Where can I find inspiration and tutorials for using Hobby Molds?
You can find a wealth of tutorials, project inspiration, and crafting ideas on Green Stuff World's website and social media channels. Joining online forums and communities dedicated to miniature modeling can also be an excellent source of ideas and support.
They have become a game-changer in the world of miniature crafting. When combined with air-drying putties, they offer endless possibilities for creating realistic bricks and other intricate elements for dioramas and miniature projects. By following the steps and tips outlined in this guide, you can take your crafting skills to the next level and create stunning, lifelike miniature brickwork.
How to paint hobby bricks using acrylic paints?
Painting with acrylic paints is a creative and enjoyable endeavor. To start, ensure your pieces are clean and free from any dust or debris. Then, choose a palette of paints in your preferred colors. Use a variety of brush sizes to apply the paint, ranging from broad strokes for the base coat to finer brushes for detailing. Begin with a base coat, allowing it to dry before applying additional layers for depth and texture.
Experiment with different painting techniques, such as dry brushing or stippling, to achieve the desired look. Once are dry, you can seal the colors with a clear varnish sealer to protect your work and give it a polished finish.
Enjoy the process and let your creativity shine as you transform plain hobby bricks into colorful and eye-catching pieces for your projects or displays.
Discover also our collection of acrylic resin and miniature bricks.