How to paint with acrylic colors in modeling
If you have ever wondered how to paint with acrylic colors so that your projects stop looking like plastic pieces and turn into works of art with depth and realism, stay tuned: in this post, we explain how to do it.
Acrylic paint is the medium par excellence for modeling and board games. Its versatility, its water base, and the speed with which it allows you to work place it above other options, but mastering it requires understanding certain behaviors of this product and using them in your favor.
Understanding the medium: What is acrylic paint?
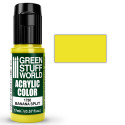
Before getting into the details of how to paint with acrylic colors, it is important to know how it works to use it to your advantage. Modeling acrylic paints, such as the Green Stuff World range, consists of three elements:
1. Pigments: These are extremely fine solid particles that provide the color. In modeling, we look for a very high pigment density but with a very small grain so as not to cover the details.
2. Binder (acrylic resin): It is the transparent "glue" that holds the pigment together and adheres it to the surface once dry.
3. Vehicle (water): This is what keeps the mixture in a liquid state. When the water evaporates, the resin polymerizes and forms a solid layer.
Knowing how to paint with acrylic colors involves managing these three elements by manipulating the mixture with the right products.
The importance of dilution
Before starting with dilution, make sure that the paint pot you are going to use is well stirred. You can do this by hand, inserting a mixing ball (if not included) and shaking the pot for a few minutes, or with a paint shaker.
The components in the bottle begin to separate when they have been at rest for a long time: solids settle at the bottom, and the upper part contains more binder and less pigment. If used without shaking correctly, the result will be a totally different color from the original and its way of adhering to the surface, and drying will change completely. The bottom part will be mainly composed of pigment and binder remains. When applied, the color will not grip well and will come off in a short time.
When the components in the pot are well mixed, you can begin with the dilution. The ability to dilute optimally comes with practice and observing the paint's behavior, so do not be frustrated if the result does not convince you at first. If you apply the product directly from the pot to the piece, the paint will most likely be too viscous. This causes two problems: brush marks (the hair leaves visible ridges) and loss of detail because it will fill in part of the sculpted hollows of the piece.
Why we should dilute acrylic paint and how to dilute it correctly
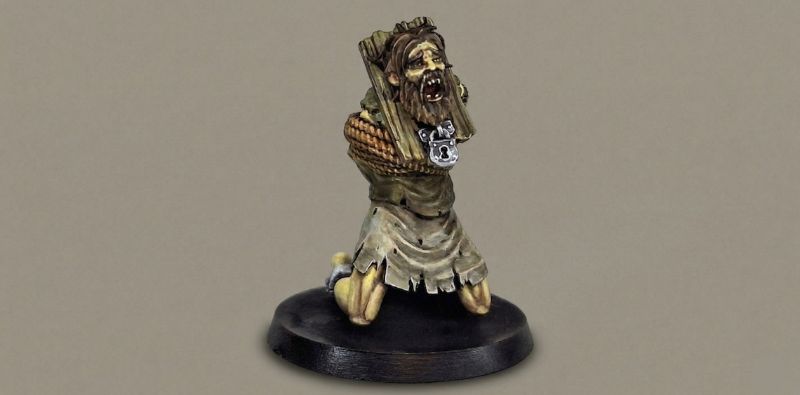
The function of dilution is to reduce the surface tension of the liquid so that it is more fluid. A diluted color "stretches" over the surface, leveling itself before drying and creating a flat, smooth layer of color. Furthermore, diluted paint is translucent, allowing you to work with the thin-layer system. Instead of covering everything with one thick coat, we apply three or four almost transparent layers, generating a much richer color saturation without unwanted textures.
Traditionally, it is said that the perfect consistency is that of skimmed milk. It should flow easily but maintain enough tension not to flood the piece. To achieve this, the most common homemade option is distilled water, although in hard water areas, it can affect the longevity of the product.
However, at Green Stuff World, we recommend the use of specific thinners such as Acrylic Thinner. Unlike water, the thinner contains a small amount of acrylic resin, which allows the color to be diluted a lot without the mixture becoming under-pigmented or losing adhesion capacity.
How to paint with acrylic colors: process and technique
Painting with acrylics is not just about applying color, but about preparing the ground so that the product performs at its best. To do this, keep the following in mind.
1. Priming
This product has difficulty adhering directly to polished plastic, resin, or metal, so it needs the surface to be painted on to be prepared for this type of paint. Priming creates a microscopic rough surface that allows the product to grip. Without a good primer, it could chip just by touching it or, directly, not adhere.
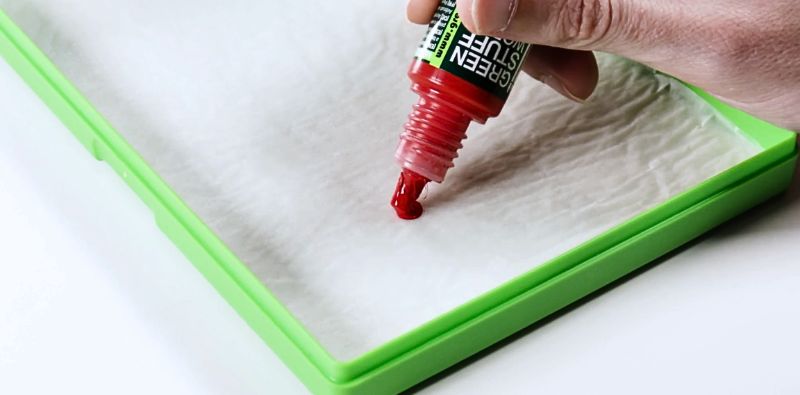
2. Wet palette
Learning how to paint with acrylic paint almost obligatorily involves the use of a wet palette. This product dries by evaporation of its water, but on a normal wet palette, it can stay fresh for hours or even days, allowing you to make complex mixtures and create your own colors without fear of them drying out.
3. Loading the brush and applying the color
Mixing the components is as important as using the paint well. The easiest way to load the brush is to use the wet palette. Place the color on the palette and add water until it reaches the right consistency, then load the brush. Do not stain all the hair so that the color does not reach the ferrule (the metal part where the hair comes out), because if it dries at this point, the hair will split.
Load the brush by turning it over the color to saturate all its sides, without letting it go too high. Before painting your project, you can test on a piece of paper if the brush paints as you expect. When you are satisfied, take the paint to your miniature or diorama. To get a good result, always paint in the same direction. Most of the time, you will use the tip to paint; however, some edges or protrusions are easier to cover with the edge of the brush hair.
If you are a beginner, it is better to start by making thin layers instead of using thicker ones; even if you have been painting for years, thin layers will offer a better result by not covering the figure's details.
Which brush is best for acrylic painting?
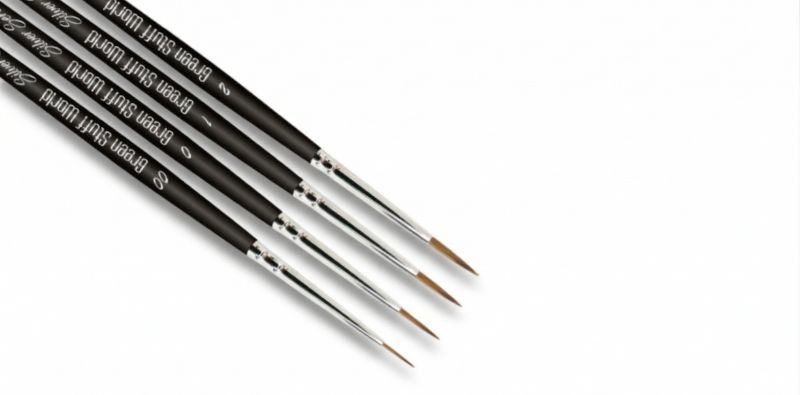
The function of the brush is to load paint and facilitate any stroke you need; any stationery brush will not do. This hobby requires tools that hold their shape and have "memory" (the ability to recover their shape), so the higher the quality, the better.
• Kolinsky Sable brush (natural): These are the best on the market. Their hair has a natural scale structure that retains the paint and releases it in a fluid and constant way. Their extremely sharp tip does not split when used properly. They are ideal for details and gradients.
• High-quality synthetic brushes: They are more resistant than natural ones, although they do not quite surpass the quality of natural hair brushes. Even so, new-generation synthetics are perfect for base coats, mixing on the palette, and more aggressive techniques.
• The shape: For 90% of the work, a round brush with a sharp tip of size 0-2 is sufficient. Flat brushes are reserved for large surfaces or specific scenery techniques.
Although the brush can affect the final result of the painting, it does not influence the drying time of the paint; this will depend on the thickness of the paint layer and, therefore, the amount of water present.
How to make acrylic paint dry faster
It is one of the fastest-drying types of paint you can use on your projects. Even so, there are times when we need it to dry almost immediately to apply the next layer. In this case, the best option is to make extra-thin layers. As we have mentioned, the less volume of liquid you apply, the sooner the vehicle will evaporate.
Another option is to use a hair dryer with a warm airflow. It will speed up evaporation, but be careful: if you use excessively hot air, you could soften the plastic of the model or cause the color to crack as the top layer dries much faster than the bottom one. You can also provide heat with heat lamps or desk lamps. Proximity to a warm light source helps, but the dryer is still superior due to the air movement.

In any case, the best option is to let it dry naturally whenever possible. Remember that in more humid places, with low temperatures and little airflow, the process can slow down. The surface on which it is applied is also an influencing factor, specifically its porosity and absorption capacity.
On what surfaces do you paint with acrylic paints?
This product is very versatile, but on each surface, it behaves differently according to its characteristics. In general, it will always need a base coat that seals the porosity and improves adhesion.
• Plastic (Polystyrene): It is the standard material, but it is usually irregular and porous or very smooth, so it requires priming.
• Resin: It often contains oils from the molding process. It is essential to wash it with soapy water before painting, or the color will "repel".
• Metal (White Metal/Lead): Being a cold and non-porous material, the paint tends to chip on the edges. Here, high-quality priming is non-negotiable.
• 3D Printing (SLA Resin or FDM Filament): In filament pieces, it can be absorbed irregularly by the layer lines. A "filler" or a thick primer is recommended before starting with colors.
• Wood and MDF: They are very porous materials. The color will be absorbed quickly, so the first layer will act as a sealer.
• Textile: This product is not formulated for textile fibers. The effect it has on this material is a plastic, thick, and rigid layer, tending to become stiff and, over time, crack.
How to dye fabric with acrylic paint
In certain recreations, real fabrics are used in modeling, but in these cases, is it possible to use acrylics? It is not the best option, because this paint will make the fabric rigid and brittle, losing its natural drape. To avoid this, there are formulas, although the best option will always be to use specific fabric paints.
If you only have acrylics available, dilute them until they look like an ink or a wash. The water will carry the pigment into the fibers without saturating them with acrylic resin. The color will be less intense, but the fabric will hardly be rigid.
Another option is to add textile medium to the acrylic color to maintain the flexibility of the polymer once dry. If you are going to manipulate the fabric after painting, it is essential to mix it with this additive.
Finally, moistening the fabric with clean water before you start painting helps to spread the color organically and smoothly through the fibers when you touch them with the paint-laden brush.
Stiffness in the fabric does not only happen with acrylics, but also when painting with oil paints, temperas, or sprays, among others.
What is the difference between oil and acrylic paint?
Oil is also used in modeling, but less frequently than acrylics, as it is used occasionally for specific techniques and panel lining. Knowing how to paint with acrylic color involves knowing its advantages and disadvantages compared to other types of paint.
| Feature | Acrylics | Oil |
| Base/Vehicle | Water | Linseed Oil / Solvents |
| Drying Time | Fast (minutes) | Slow (hours or days) |
| Transitions | Require layering or glazing techniques | Allow colors to be blended directly on the piece |
| Cleaning | Soap and water | White Spirit or Turpentine for brushes |
| Resistance | High once dry | Sensitive until fully cured (weeks) |
Acrylics are ideal for structured work, base colors, and crisp details. Oil is the king tool for weathering, as its slow drying allows rust or dirt stains to be blurred with a smoothness that acrylics can hardly match without retarders.
In the end, understanding how to paint with acrylic colors is not achieved in one afternoon, but understanding the fundamentals explained here will save you years of frustration. The key lies in dilution, respecting drying times, and choosing the right tools like Kolinsky brushes and wet palettes.
In modeling, acrylics are your most faithful ally. They are a medium that forgives mistakes, as you can always paint over a previous layer once they are dry. Do not be afraid to experiment with mixtures to get that perfect tone or test how your paint reacts on different surfaces.
Share this content