How to make skin color with acrylic paint
Replicating a skin tone from scratch is a challenge every artist must face. This is because every face, every hand, and every patch of epidermis is made up of unique nuances that depend on genetics, as well as the immediate shadows and highlights of the moment being depicted.
Capturing this chromatic diversity in painting isn’t just about choosing a simple “beige” or a chocolate shade. It requires a deep understanding of color theory, the environment surrounding the subject, and the artist’s sensitivity to recreate the skin's texture and vitality.
Below, we offer a comprehensive guide explaining how to make skin color with acrylic paint using only primary colors and white to achieve a wide and varied range of hues.
The different skin tones
Before we start discussing how to make skin color with acrylic paint and mixing pigments, it's essential to understand the structure of the dermis from a color perspective. Human skin is never uniform; even a seemingly homogeneous face has subtle variations that reflect blood circulation, pigmentation, and light incidence.
All tones are derived from the three primary colors—magenta, yellow, and blue—with varying dominance depending on the desired shade. Furthermore, all epidermis tones, to a greater or lesser extent, contain white. It’s worth noting that all tones stem from a neutral hue, so to learn how to make skin color with acrylic paint, you must start with a brown mix or, failing that, a derivative of brown.
Light Tones: Although they contain all three primary colors, these mixes are dominated by white and, to a lesser extent, yellow, with tiny amounts of blue and magenta. Keep in mind that you’ll need to develop a tonal range around this base to create the highlights and shadows that give the face and the rest of the dermis volume and texture.
Medium Tones: These combine yellow and white with small amounts of blue and slight touches of magenta. They are typical of Caucasian or mixed-race skin. It will also be necessary to create a tonal range around the main hue.
Dark Tones: Mixing the three primary colors results in brown. If you need to deepen the shade, play with magenta and blue until you find the most suitable one. Pure black is not the most advisable option, as it can "dull" the skin's warmth, so you should avoid using it.
How to mix colors for each skin tone
Acrylic is an extremely versatile medium, characterized by its fast drying time and high pigment intensity. However, this drying speed demands planning and precision in the mixing process. Another advantage of acrylic paint is that it allows you to work in thin layers, integrating highlights and shadows progressively. You must also remember that the hue of acrylic paints can shift slightly when dry, usually becoming a bit lighter. The same variation applies to drying time, which depends on the paint brand and, if diluted, the type of medium used.
To observe the transition of all epidermis tones, it’s easiest to start with brown tones. These tones act as a starting point, allowing you to see how subsequent color mixes will behave clearly. Starting with browns makes it easier to create smooth transitions between lights and shadows because they absorb and balance the nuances added later. From here, by adding the correct amount of primary colors or white, you can achieve the exact shade you're looking for. Let’s look in detail at how to make skin color with acrylic paint.
1. Create a firstm mix of primary colors
Different shades of brown can be achieved using the primary colors. Depending on the specific tone you need, you should create the brown using different primary colors. One way to do this is by mixing two primary colors first, and then adding the third or white to achieve the necessary tone or sub-tones. This first mix will depend on whether you are looking for warmer or cooler dermis.

For warm and lighter tones, start by mixing magenta and yellow to create an orange. Conversely, if you are looking for cool skin or darker shades, starting with purple—by mixing blue and red—is the best option. Of course, this initial mix is not the final hue; it's simply meant to generate a base onto which other primary colors can be added to achieve nuances and adjust intensity.
2. Find the best brown tone for your project
To your previous mix, add the third primary color in the necessary proportion to achieve the brown tone you need for your project or the best foundation to create it. Remember that all skin colors contain white, in lesser or greater quantities. The goal, therefore, is to reach a brown that serves as a base, from which lighter or darker variations can be created to give the face volume and realism.

This step requires patience and observation because even slight changes in the proportion of each color can significantly alter the warmth or coolness of the final tone. Once achieved, you can use it as a reference to lighten or darken specific areas by adding the corresponding color, lending depth, naturalness, and consistency across all areas of the epidermis.
3. Darken or lighten to achieve your goal
Using the hue obtained in the previous step as your base, you will need sub-tones to recreate the natural shadows and highlights of the face or those formed by the incident light and shadows of the environment. To darken, do not go straight for black, as it hardens the hue and creates an unrealistic effect. Instead, we recommend experimenting with small amounts of blue or magenta and white.
Blue helps deepen shadows by adding coolness, while magenta generates warmer and more intense nuances. By adjusting the proportion of these colors, it is possible to achieve very subtle variations that enrich the modeling of the face. This will give you a broader and more natural tonal range with which to add volume, depth, and character to the skin.

On the other hand, to lighten the tone, the most common approach is to add white, but this step requires care. If you add too much, the mix can become dull or artificial, so it is advisable to balance it with a little yellow or magenta, depending on the color you want to obtain. This also helps recover the characteristic warmth in light tones, making the shade more luminous and realistic without losing naturalness. It is a key process for marking the highlights of the face—the areas where light strikes most intensely, such as the cheekbones, forehead, or the tip of the nose.
Pre-mixed skin-colored acrylic paint
Although we’ve explained how to make skin color with acrylic paint, it is very common to use a base color purchased in a specialized store and then create the sub-tones from that. This method is more convenient because you always have the base paint available and won't lose the exact tone, even if you paint in different sessions. You can also purchase pre-mixed sub-tones, although many artists prefer to create them because it uses much less paint. The disadvantage is that you must paint all the highlights and shadows in the same session so as not to lose the exact shade.
The importance of the environment in skin tone
To choose the right tone and know how to make skin color with acrylic paint perfectly for each project, you must take several factors into account.
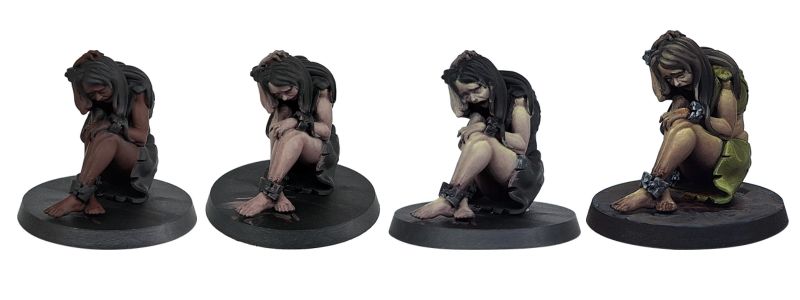
The first is knowing what race you are painting. In the world of miniatures, there are figures of multiple races with very diverse skin colors. If it's an alien or a fantasy figure like an Orc or a Lizardman, human skin colors are ruled out, so you should check out other tutorials on our blog to paint them correctly.
Once the race of your miniature is identified, you need to know the environment it is in, as the colors of the light and shadows of the surroundings can lend a completely different hue to the miniature’s epidermis. It is necessary to differentiate between cool and warm spaces, or those involving other types of illumination. Being in the snow is not the same as being in the Sahara desert, inside a nightclub, or on a poorly lit spaceship, in the sun or at night. In each of these environments, a human figure is lit or shadowed in a totally different way. For example, if the environment is very bright, warm tones usually predominate, with a higher proportion of yellow and a little more red than usual in the mixes. Conversely, in cooler contexts, blue will dominate.

You might also need more neutral tones. In this case, the color most commonly used when neither warm nor cool is required is magenta, and sometimes, green. Greenish shadows are very common when painting Middle Eastern skin tones, as they often have olive nuances. Even so, if other shades dominate the setting, they must be integrated into the face.
Application and realism techniques
You don’t just need to know how to make skin color with acrylic paint. The paint application technique is almost as important as the choice and mixing of colors. To achieve a realistic face in terms of color, it is crucial to work in layers, always starting with an intermediate base tone that covers the entire dermis surface. This initial layer is not meant for detail but to establish color uniformity and serve as a support for the application of shadows, highlights, and nuances. A well-applied base allows subsequent layers to integrate more smoothly, avoiding patches or abrupt differences that could break the realism.
The next step is to work on the shadows. These are the areas where light does not strike directly, such as under the chin, around the eyes, in the skin folds, or under the hair. Typically, these areas require darker tones that harmonize with the epidermis' base color. This is a general reference, as the shadows’ position will shift based on where and how you decide the light should originate in your project, guided by the environment. To fill them in, use a variation of your base hue, darkening it without using black. The key is to carefully blend these shadows to integrate them naturally without losing the sense of depth and volume.

Highlights are equally essential, as they bring life to the face. Light points are located where the light hits strongest, usually, if the illumination is frontal, on the cheekbones, forehead, the tip of the nose, the chin, and the lips. Applying the light with smooth, gradual circular movements maintains realism and integrates the color with the base without eliminating the warmth characteristic of a real face. This makes volumes convincing and adds luminosity to the portrait.
Finally, subtle nuances make all the difference, adding authenticity and vitality to the dermis. Small touches of green or even reddish tones in olive skin can be applied to areas such as the cheeks, eyelids, around the nose, or the jawline, simulating the normal variations in blood flow, the translucency of the dermis, or environmental reflections. These interventions add depth and chromatic richness.
Although the epidermis tone base should be made with acrylic paint, other types of paints can be used for certain finishes. Watercolors, with a more earthy finish, are recommended only for very specific details and color filtering techniques. The same applies to oils, which are perfect for finishes using mixed media. Oil paint is highly pigmented, more saturated, and since its composition includes oil, its drying process is different.

Continuous observation is important throughout the process to maintain perspective. Working with real references allows you to capture color nuances, shadows, reflections, and details that are difficult to perceive from memory alone. Closely observing how tones vary according to light and human anatomy is what distinguishes a flat portrait from a truly realistic one.
By following these guidelines, you will not only learn how to make skin color with acrylic paint but also how to apply it correctly and the importance of reflecting the setting in your miniatures.
Share this content