How to remove paint from plastic models
Every modeler, whether a beginner or a veteran, has at some point been dissatisfied with a paint job on a miniature, possessed old second-hand figures needing a total restoration, or simply found that excess layers have buried the finest sculpted details and would like to repaint them for a better finish. Knowing how to remove paint from plastic models without damaging the polystyrene or resin is invaluable knowledge in this hobby.
In this technical guide from Green Stuff World, we delve into the chemical and mechanical methods for stripping plastic miniatures. We will see why certain products are a real danger to a model and how professional solutions can save hours of work, ensuring the plastic returns to its original state, ready for a new primer.
The chemical challenge: Why is plastic so delicate?
Before diving into the products, it is vital to understand the material we are working with. Most modern miniatures are made of high-impact polystyrene or photosensitive resins. Unlike metal, plastic is an organic polymer that can react to certain solvents. The goal of stripping is not just to eliminate the pigment, but to break the bond of the acrylic resin or enamel without the solvent penetrating the molecular chains of the plastic, which would cause the figure to soften, melt, or lose detail.
Acrylic paint, once cured, forms a resistant plastic film. To remove it, we need an agent that "swells" that film and separates it from the surface. However, if the agent is too aggressive, it will not distinguish between the paint and the substrate. Therefore, choosing the product is an important decision that should not be taken lightly. It is the first step in understanding how to remove paint from plastic models without damaging the figures.
Green Stuff World Paint Remover: The professional solution
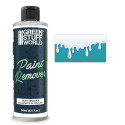
At Green Stuff World, we have developed Paint Remover, a product specifically designed to remove paint from miniatures for modelers who wish to do so. Unlike generic industrial strippers, ours is formulated to be relentless with acrylics, enamels, and lacquers, yet respectful toward model plastic. Its great advantage is that it is non-corrosive to this material (when used according to instructions) and lacks the toxic fumes common in other solvents.

How to use Paint Remover to strip paint from miniatures step by step
Miniatures can be submerged for up to 6 hours in this product, but only the most resistant ones. It depends on the material they are made of and the type of paint used. In general, metal miniatures will not suffer any damage as they are a very resistant material. On the other hand, printing resins and plastics are more fragile materials that can be altered if they stay in contact with some products longer than necessary. In this case, we want to know how to remove paint from plastic models, so it will be necessary to follow the specifications of this stripper for this material.
1. Partial disassembly: If the miniature has very delicate parts or you want to make cleaning joints easier, you can disassemble it. It is also appropriate to separate it from the base if it is decorated with organic or non-organic materials other than paint, such as sand or grass.
2. Bath: Submerge the miniature in a container (preferably glass or resistant plastic) where it fits and can be covered with the Paint Remover liquid. This product has a low evaporation rate, but to avoid losing that small part of the product and to ensure its vapors function correctly, using an airtight container is recommended. Depending on the age and type of paint, as indicated before, the acting time can vary between 30 minutes and 2 hours.
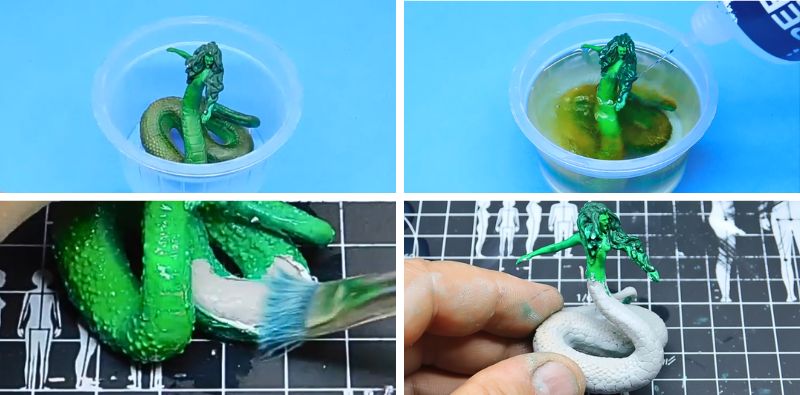
3. Scrubbing: When the paint begins to wrinkle or peel off in sheets, it’s time to act. It will be softened, so you only need to remove it from the miniature. To do this, use a brush or a synthetic nylon bristle brush and remove the paint. Sometimes it is necessary to scratch a little, so an old toothbrush can be a perfect tool. Using a wooden toothpick moistened in the stripper can be useful for removing persistent remains in deep recesses (armpits, shield reliefs, etc.).
4. Rinsing and degreasing: Before repainting the miniature, rinse it well to clean any remains of the stripper so the primer can adhere properly. You can use warm water and dish soap.
In the case of plastic figures, it is not recommended to keep them in contact with the stripper for more than one or two hours; if necessary, repeat the process to finish removing the paint remains from the plastic. Furthermore, having a low evaporation rate, it is not necessary to submerge them completely; it is enough to "paint" them with the stripper in an airtight container and let it act for the indicated time. If you follow the instructions, GSW's specific miniature stripper is the safest option and the best substitute for non-specialized products used years ago.
Isopropyl alcohol for stripping paint from plastic
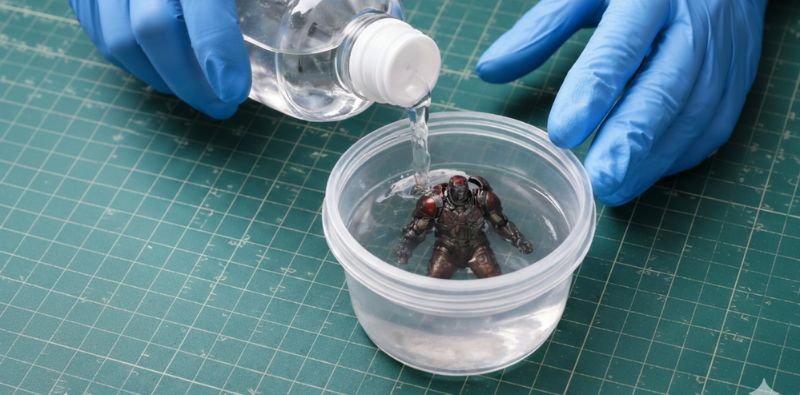
Isopropyl alcohol (IPA) with 99% purity is the most widespread traditional method among hobbyists, thus being one of the answers to "how to remove paint from plastic models." It works based on its ability to dissolve the resin of acrylic paints without attacking rigid polystyrene. It is an economical and relatively fast method: a 20 to 40-minute immersion is usually enough for most standard brand paints to start yielding. However, high-quality anti-corrosive paints will be difficult to remove.
Nonetheless, isopropyl alcohol has its limitations. First, it is extremely volatile and flammable, so it must be used in well-ventilated spaces. Second, although safe for the hard plastic of traditional models, it can be catastrophic for certain 3D printing resins or softer plastics, making them brittle if left submerged too long. Additionally, it often struggles with high-resistance primers and quality anti-corrosive paints, which frequently require several intense scrubbing sessions that could damage small parts through mechanical stress.
Unlike GSW's stripper, the volatility of isopropyl alcohol causes almost instant evaporation; therefore, to use it as a stripper, continuous scrubbing is necessary once removed from the container. In fact, it will be necessary to resubmerge or re-wet the mini with this alcohol to remove all the color.
Why you should never use nail polish remover or acetone
One of the most common and tragic mistakes in modeling is trying to remove paint from plastic models using nail polish remover or pure acetone. The reason is purely chemical: acetone is an extremely powerful solvent that has the ability to dissolve polystyrene. The moment a plastic miniature touches acetone, the material begins to deform or melt. What was once a soldier with defined details becomes, in a matter of seconds, a formless mass of disfigured plastic.
Even "acetone-free" nail polish removers usually contain acetates or other solvents that, while they may not melt plastic instantly, do soften the surface, erasing fine details and leaving the plastic with a sticky texture that never fully hardens again. Other household products to avoid include:
• Universal hardware solvents: Designed for wall paints or heavy metals, they are too aggressive.
• Oven cleaners: Although a popular method years ago, many current formulas have changed and contain caustic soda in proportions that can burn skin and damage certain plastics.
• Turpentine/White Spirit: Besides the lingering smell, they can yellow the plastic and irreversibly weaken glue joints. They should only be used for metal miniatures, although more effective methods exist.
Remember that most of these products are very aggressive, and it is necessary to use proper protection if you decide to use them, even though Green Stuff World does not recommend them. Use nitrile gloves, a 3M respirator mask, and protective goggles at all times.
Stripper comparison by material
Not all modeling materials react the same way. To help you decide, we have prepared this comparative table.
| Product | Plastic (Polystyrene) | Casting Resin | 3D Resin | Metal (Lead/Pewter) |
| GSW Paint Remover | Excellent (Safe) | Very Good | Good (Watch time) | Excellent |
| Isopropyl Alcohol | Good | Risk of softening | Risk of breakage | Good |
| Acetone (metal) | VERY DANGEROUS | Dangerous | Dangerous | Excellent |
| Brake Fluid | Risk (Toxic) | Not recommended | Not recommended | Good |
Safety and maintenance tips
Working with chemicals, even safe ones like our Paint Remover, requires certain precautions. The use of nitrile gloves is highly recommended; not because the product will corrode your skin instantly, but because prolonged contact with solvents removes the skin's natural oils and can cause dryness and irritability. Likewise, working under a lamp with good lighting will allow you to see if paint remains in the crevices before the product dries.
An expert tip is not to throw away the Paint Remover after a single use. You can filter it with a coffee filter to remove old paint flakes and store it in a separate airtight jar for a "dirty" second use. This is not only more eco-friendly but also saves product during preliminary cleanings, leaving the fresh liquid only for the final touches.
Always remember to test any new product on a scrap plastic sprue if you have doubts about the material's reaction. Modeling is constant learning, and stripping is, in essence, the "undo" button that allows us to achieve perfection in every piece.
Therefore, knowing how to remove paint from plastic models allows you to unleash your creativity without fear of error. Whether you failed with the airbrush or want to update an army painted ten years ago, with the right tools like Green Stuff World's Paint Remover, the process is clean, safe, and effective.
Share this content