How to paint brass effect on miniatures?

Welcome to a new intermediate-level tutorial from Green Stuff World. This time we will show you how to paint a weapon with a brass effect, which will make it look rusty or, simply, built in this material. It is not only useful to give a realistic touch to some weapons, but it is also valid for armor and machinery. For this, we will use top-quality materials available in our catalog.
In fact, it is perfect for the frame, spears, and swords of the Undead army of Sylvania, ruled by the Warhammer Vampire Counts. Sylvania is one of the most feared regions in the entire empire, located in the shadow of the Mountains of the End of the World. No human dares to set foot on these lands after nightfall, and those brave enough to do it are accompanied by the best fighters. One of the reasons is because of the armies of Undead that have been roaming their lands since the year 111, after the Great Plague. Since then, misfortunes have not ceased to befall the territory.
Sylvania did not manage to recover from the Black Death, drastically reducing its population and increasing the number of diseases and mutations, as well as corpses that left their graves to roam the region. Throughout this time, the members of the House of von Dark devoted their meager efforts to ruling despotically and running away from conflict. This changed when, last von Dark's deathbed, Otto's daughter was betrothed to a vampire, unbeknownst to father and daughter, opening the door to the control of these beings.
Upon learning the truth, a spell was cast over Sylvania to awaken zombies, skeletons, and other corpses; creating a great Undead army ready to fight alongside the peasants with whom they live. Thus, the Vampire Counts began a war against the three emperors.
In order to fill with realism pieces like the skeletons of the Undead army or any weapon of this scenario or others, you can use the brass effect or rust effect we teach you step by step in the downloadable. You can get it for free by clicking on the image in the upper right corner of this post.

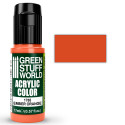
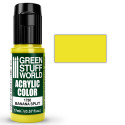
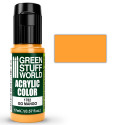
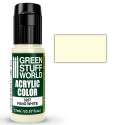
We will use several of Green Stuff World's acrylic paints, as well as dipping inks and some painting tools. Specifically, you will need miniature dry brushes, as this will be the first technique we will use, and the colors: Redwood Brown acrylic paint, a mixture of Redwood Brown and Ember Orange, Ember Orange, and a mixture of the latter with Banana Split. Next, to get closer to the brass color we are looking for, we will use Orange Dipping INK, Red Opulence Dipping INK, Ork Flesh Dipping INK, Ember Orange and Go mango. Combining some of the aforementioned paints, we will give some final coats to illuminate and detail the lights.
As always, to protect the paint, it is recommended to apply a coat of one of our varnishes. Of course, if you want to place your miniatures on a base, on the Green Stuff World website you will find Warhammer bases of all shapes and sizes. In addition, we have other accessories for your figures such as a light box for photography, rotating display stand, miniature carry case, or MDF wood displays, among many other products.
This technique which allows you to give a professional bronze effect finish to your figures has been designed and painted by Green Stuff World collaborator, Roi Gonzalez. Keep learning and improving your miniature creation and painting techniques in our blog.
Share this content