

How to Paint Resin Figures with Kolinsky Brushes

Painting resin figures is one of the best ways to explore precision miniature painting. Resin is capable of reproducing extremely fine sculpted details, from facial expressions and strands of hair to fabric textures, ornaments, armor scratches, and small accessories. That level of definition offers enormous creative possibilities, but it also means that the painter needs sufficient control to take advantage of those details instead of covering them under thick layers of paint.
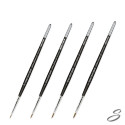
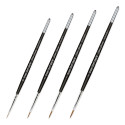
This is where the choice of brush becomes especially important. Kolinsky brushes are particularly useful when painting resin figurines because they combine a very fine point with good paint retention and controlled release. This allows the painter to work on small areas for longer without constantly reloading the brush, while maintaining the precision required for highlights, eyes, facial features or small decorative elements. Green Stuff World specifically recommends them for miniatures and collectible figures because of these characteristics.
Learning how to paint resin figures with Kolinsky brushes, however, is not simply a matter of using the smallest brush available. Preparing the resin properly, choosing the right brush size, controlling paint consistency and knowing when not to use a Kolinsky are just as important as the final detail work.
Why are resin figures so popular for painting?
One of the main advantages of resin figures and busts is the amount of detail the material can reproduce. Traditional cast resin and modern 3D printing resins can preserve very small textures and intricate sculpting that make these pieces especially attractive for display painting, competitions, and collection projects. GSW's own category describes resin figures as paintable collectibles available in different styles and sizes, from smaller figurines to larger busts and statue-like models.
A larger resin bust, for example, gives the painter enough surface to explore subtle transitions in skin, eyes, hair and fabrics. A smaller resin figurine demands considerably more precision because those same elements occupy only a few millimeters.
In both cases, the basic principle is the same: the sculpture provides the physical information, while paint creates the visual hierarchy. Shadows increase the perception of depth, highlights define shapes and fine lines separate materials or emphasize details that might otherwise disappear.
For that reason, highly detailed resin is an ideal surface for controlled brushwork.
How to prepare resin figures before painting
Even the best Kolinsky brush cannot compensate for poor surface preparation. Before thinking about color, the resin figure must be ready to accept paint.
Traditional cast resin may contain residues from the manufacturing or release process. Green Stuff World's acrylic painting guide recommends washing resin with soapy water before painting because these residues can interfere with the adhesion of acrylic colors.
Inspect the entire figure carefully. Remove mold lines, casting remains or printing supports and correct visible imperfections with suitable sanding tools. If the model consists of several pieces, test the assembly before gluing them permanently. Gaps between components should also be corrected before painting because they become considerably more noticeable once shadows and highlights are applied.
Once the surface is clean and smooth, apply an appropriate primer. Acrylic paint has difficulty adhering directly to polished resin, and primer creates a surface that improves grip and helps prevent the paint from rubbing or chipping away. The existing GSW resin figure guide likewise recommends surface preparation and priming before painting.
Do not use the primer to hide imperfections. If mold lines, seams or printing defects are still visible before priming, correct them first. Thick primer can obscure exactly the sculpted detail that makes a resin figure interesting.

What is a Kolinsky brush?
A Kolinsky brush is a natural-hair paintbrush traditionally made with hair from the Siberian weasel. The material is prized in miniature painting because the bristles combine flexibility, paint retention and the ability to form a very precise point.
That combination is particularly valuable when painting resin figurines.
A very fine point lets you place paint exactly where it is needed, while the body of the brush carries enough liquid to prevent the paint from drying immediately during the stroke. This makes it easier to produce thin lines, controlled highlights and gradual transitions.
The important concept here is that brush size and brush precision are not the same thing.
A tiny brush with very few bristles may hold almost no paint. It can dry before you finish the stroke and force you to reload continuously. A slightly larger Kolinsky brush with a perfectly shaped point may actually provide better control because it combines greater paint capacity with an equally fine working tip.
This is why sizes 1 and 2 are among the most versatile brushes for miniature painting, while the smallest sizes are better reserved for particularly delicate details. GSW's brush guide specifically warns against relying exclusively on very small brushes.
What size Kolinsky brush should you use for resin figures?
The correct size depends less on the overall size of the figurine than on the area you are currently painting.
| Brush size | Main use on resin figures |
|---|---|
| 00 | Eyes, pupils, extremely small markings and very fine lines |
| 0 | Faces, small details, sharp edge highlights and controlled lining |
| 1 | General detail painting, layering, skin, fabric and small areas |
| 2 | Larger layers, controlled base coats and broader blends |
Green Stuff World's existing miniature brush guide identifies sizes 000, 00 and 0 as appropriate for particularly fine details, while sizes 1 and 2 are considered more versatile for layering and general painting. Its Kolinsky category specifically recommends sizes 0 or 00 for painting miniature eyes.
Therefore, buying only the smallest Kolinsky brush available is usually unnecessary.
For much of a resin figure, a size 1 or 2 with a good point can provide more consistent results than an ultra-small brush. Then move to size 0 or 00 when you genuinely need to reduce the working area.

How to paint resin figures with Kolinsky brushes step by step
Once the figure has been prepared and primed, painting can begin. The exact process varies according to style, color scheme and scale, but a structured workflow helps preserve the sculpted detail throughout the project.
1. Apply the base colors
Begin by establishing the major color areas: skin, clothing, armor, hair, leather, weapons, and other materials.
Do not try to obtain complete opacity with one thick coat. Thin layers are preferable because they level more smoothly and are less likely to cover small sculpted details. Green Stuff World's acrylic painting guide recommends applying several thin layers rather than one heavy layer for exactly this reason.
For very large areas, a synthetic brush or airbrush may be more efficient. A Kolinsky does not need to perform every task simply because it is a high-quality brush.
When working on moderately sized sections with a Kolinsky, a size 1 or 2 usually provides a good balance between paint capacity and precision.
Load only part of the bristles. Paint should never reach deep into the ferrule, where dried residue can gradually spread the hairs and destroy the point.
2. Establish the shadows
Once the base colors are solid, identify the areas that receive less light.
On a face, this usually includes areas around the eye sockets, beneath the cheekbones, under the lower lip, beneath the chin, and around sections covered by hair. On clothing, shadows appear inside folds and underneath overlapping layers. Armor produces stronger separations between panels and around structural details.
Use a darker version of the base color rather than automatically adding black to everything. The goal is to increase volume while keeping the color coherent.
A Kolinsky brush is very useful here because its point allows the painter to place darker colors precisely inside recesses rather than flooding the entire surface.
3. Build the highlights with controlled layers
Highlights define the areas facing the light and are one of the stages where the detail of a resin figure becomes particularly noticeable.
Begin with broad highlights using a size 1 or 2, then reduce the painted area as the color becomes lighter. The final highlights should occupy only the most exposed parts of the shape.
On fabric, these might be the tops of folds. On a face, the forehead, nose, cheeks, and chin. On armor, the edges facing the light.
Avoid jumping directly from the base color to the brightest highlight. Several intermediate stages create greater depth and make the transitions easier to control.
4. Smooth transitions with glazing
Resin busts and larger figures often contain broad areas where hard transitions can appear unnatural, especially on skin.
A glaze consists of a very thin, transparent layer of color applied over an existing transition. Rather than covering the underlying colors, it modifies them subtly.
Kolinsky brushes work particularly well for this because their paint-carrying capacity allows a smooth, controlled application. Before touching the figure, however, remove excess liquid from the brush. A glaze should tint the surface rather than form a visible puddle.
Several very subtle applications provide far more control than one saturated pass.
5. Paint the smallest details
Fine details are where Kolinsky sable brushes offer their most obvious advantage.
Eyes, facial markings, buckles, jewelry, scratches, runes, small buttons and decorative borders require a stable point and consistent paint flow. Green Stuff World's brush guide highlights this ability to retain a fine point as one of the main reasons Kolinsky brushes are particularly appropriate for miniature painting.
For these areas, change to a size 0 or 00 only when necessary.
Remember that precision depends not only on the brush but also on paint consistency. Paint that is too thick will not leave the tip smoothly; paint that is excessively diluted can spread into neighboring areas.
Before making an important stroke, test the brush on the palette to verify both the consistency and the sharpness of the point.
How to paint faces on resin figures with a Kolinsky brush
Faces are often the visual focus of a resin figure, especially when painting busts.
Begin with an intermediate skin tone that gives you room to move both darker and lighter. Once the base has dried, gradually add shadows and highlights according to the position of the imaginary light source.
The smallest brush is not necessarily required for all stages of the face. A size 1 with a sharp point can usually handle cheeks, forehead, nose and jaw transitions while carrying enough paint for smooth strokes.
Reserve sizes 0 or 00 for details such as the eyes, eyebrows, lip separation, small scars or individual strands of hair.
The eyes should normally be painted only after the surrounding skin is reasonably developed. A size 0 or 00 allows the whites, iris or pupil to be positioned with greater control. Green Stuff World specifically identifies these two sizes as common choices for miniature eyes.
When working at this scale, stability matters almost as much as the brush itself. Rest both hands against each other or against the work surface whenever possible. Reducing unwanted movement gives the brush tip much greater effective precision.
Edge highlighting and fine lines
Resin armor, weapons and mechanical components frequently contain sharp sculpted edges that can be emphasized with edge highlighting.
Load a small amount of paint onto a pointed Kolinsky brush and remove the excess. Whenever the geometry permits it, use the side of the tip rather than trying to draw every edge with the absolute point. The physical edge of the model will naturally guide the brush.
For extremely fine scratches or painted markings, use the point itself and work with paint sufficiently fluid to leave the bristles without pressure.
A well-controlled line should come from the movement of the brush rather than from pressing the hairs against the miniature. Excessive pressure widens the tip and makes the stroke much less predictable.
Should you use Kolinsky brushes for every painting technique?
No. One of the most important habits in miniature painting is using the correct tool for each technique.
Kolinsky brushes are designed to provide precision and controlled paint release. Techniques based on aggressive friction can quickly damage the tip.
The clearest example is dry brushing. Green Stuff World's dry brushing guide explicitly advises against using sharp-pointed brushes such as Kolinsky sable for this technique. Dry brushing requires dense, rounded or domed bristles and repeatedly rubs the brush across raised textures, making it unnecessarily aggressive for a precision brush.
If you want to highlight fur, rough stone, chainmail or heavily textured areas on your resin figure using dry brushing, change to a dedicated dry brush.
This distinction also makes financial sense. Preserve the Kolinsky for the tasks where its characteristics actually improve the result: controlled layers, glazing, fine lines, eyes, edge highlights and small details.
How to clean and care for Kolinsky brushes
A good Kolinsky brush can maintain its precision for a long time, but only if paint is prevented from drying inside the bristles.
Rinse the brush regularly during the painting session rather than waiting until the end. After finishing, clean it carefully with an appropriate brush soap or cleaner, removing all remaining pigment.
Green Stuff World recommends reshaping the point after cleaning and leaving the brush to air dry without resting it on its bristles. Brushes should also not be left immersed in water or solvent for extended periods because this can damage the natural hairs.
The most important area to protect is the base of the bristles near the ferrule. If paint accumulates there and dries, it gradually forces the hairs apart. The brush may still look clean from the outside but will stop forming a sharp point.
Good maintenance is therefore part of the painting technique itself. A damaged point changes the way paint is released and makes precision work increasingly difficult.
Common mistakes when painting resin figures
Most problems encountered when painting resin figures are not caused by a lack of artistic ability but by small technical decisions made during preparation or application.
- Painting directly over unprepared resin: oils, dust or manufacturing residue can reduce adhesion. Clean and prime the model first.
- Using thick coats to cover faster: thick paint can fill fine sculpted recesses and reduce the definition of the figure. Several thin layers are safer.
- Using only size 00 brushes: extremely small brushes hold little paint. A size 1 or 2 with a sharp point is often more useful for most of the project.
- Overloading the brush: too much paint reduces control and increases the risk of liquid reaching the ferrule.
- Using Kolinsky for dry brushing: this aggressive technique can damage the point. Use a dedicated brush instead.
- Painting details before establishing the volumes: eyes and tiny decorations are easier to integrate after the main shadows and highlights are already defined.
- Neglecting brush cleaning: dried paint near the ferrule is one of the fastest ways to lose the sharp point that makes a Kolinsky useful.
Presenting a finished resin figure
Once the painting is complete, presentation becomes part of the final result.
Many resin busts and collectible figures are intended for display rather than tabletop gaming, so the base or plinth should visually support the character without competing with it. GSW's resin figure category specifically highlights display pieces and busts as a major part of this type of model.
The environment can also reinforce the story told by the paint. A mechanical character can be paired with an industrial display base, while a fantasy character can use rocks, vegetation or battle debris.
Green Stuff World's existing advanced tutorials on industrial bases and display environments can serve as additional references when moving from painting the figure itself to presenting it as a complete display piece.
Frequently asked questions about resin figures and Kolinsky brushes
Do resin figures need primer?
Yes, priming is highly recommended. Resin can be relatively smooth, and acrylic paint adheres much better to a properly prepared and primed surface. Resin should also be cleaned before priming to remove residues that could repel paint.
What paint should I use on resin figures?
Acrylic paints are the most practical option for most miniature painters because they dry quickly, can be applied in thin layers and work well with the controlled techniques used on resin figures. Green Stuff World's resin guide identifies acrylic paints as the recommended general option for these models.
What is a Kolinsky brush used for?
Kolinsky brushes are particularly suitable for precision miniature painting. Their fine point and paint-carrying capacity make them useful for layering, glazing, highlights, faces, eyes and detailed decoration.
What size Kolinsky brush is best for miniatures?
Sizes 1 and 2 are highly versatile for much of the painting process. Sizes 0 and 00 are better suited to very fine details such as eyes and thin lines.
Can you dry brush with a Kolinsky sable brush?
It is not recommended. Dry brushing is an abrasive technique and pointed Kolinsky brushes are not designed for repeated friction across textured surfaces. Use a dense, rounded dry brush instead.
Getting the most from resin figures and Kolinsky brushes
Learning how to paint resin figures with Kolinsky brushes is ultimately a matter of matching the precision of the tool to the precision already present in the sculpture.
Resin gives the painter highly defined surfaces, facial features, textures and ornaments. Kolinsky brushes provide the control needed to preserve and emphasize those elements through thin layers, carefully placed shadows, highlights, glazing and small details.
The key is not to use the most expensive or smallest brush for every stage. Prepare the resin correctly, prime it, build the color with thin layers and use larger brushes whenever possible. Then bring out the Kolinsky size 0 or 00 when the model genuinely requires extreme precision.
A well-maintained Kolinsky brush will not make painting automatic, but it allows your hand and your technique to reach details that a damaged or poorly chosen brush would make unnecessarily difficult. Combined with a well-prepared resin figure, it becomes one of the most precise tools available for turning an unpainted collectible into a finished display piece.
Share this content