How to cure UV resin
UV resin has changed the way resin is used, both in modeling and in crafts. Unlike the two-component epoxy one, that require hours of waiting and precise mixing, this product offers an almost instantaneous result when comparing waiting times. This speed has its "fine print", which is important to know before working with it. One of the most recurring questions before its first use is “How to cure UV resin”, as it mustn't remain sticky, does not yellow, and does not generate internal bubbles to achieve a crystal-clear water effect in a diorama or a simple shiny transparent protective layer on a piece of jewelry.
In this Green Stuff World guide, we delve into the science behind photopolymerization and analyze exposure times based on the power of the tools used to cure it. Get ready to master this material and take your water effects, lenses, and encapsulations to the next level of realism.
How UV resin works: Photopolymerization
To understand how to cure UV resin and the reason behind what happens at a molecular level, it is necessary to explain the chemical process that occurs between the resin and light. This product is a photosensitive substance composed of oligomers (short chains of molecules that define the final hardness, flexibility, and resistance of the cured material after exposure to ultraviolet light) and monomers (molecules that transform the liquid into a solid during the curing process) mixed with photoinitiators (activators to solidify the product). When photoinitiators are exposed to a specific wavelength (usually between 365 nm and 405 nm of UV light), they absorb the light energy and trigger a chemical chain reaction that solidifies the liquid in seconds. Therefore, ultraviolet light functions as a catalyst.
This process is exothermic, which means it generates heat. In very small modeling pieces, this is usually not a problem, but if you apply a layer that is too thick all at once, the heat buildup can deform the plastic of the miniature or create internal cracks. Therefore, the secret to success lies in controlling the intensity, time, and the amount of product to be cured at once.
Many novice modelers believe that "more light is better," but overexposure can burn the product, giving it a yellowish tone that destroys the transparent water effect. Balance is key: short bursts of exposure, followed by cooling periods, are the recommended technique for high-volume pieces.
Curing UV resin
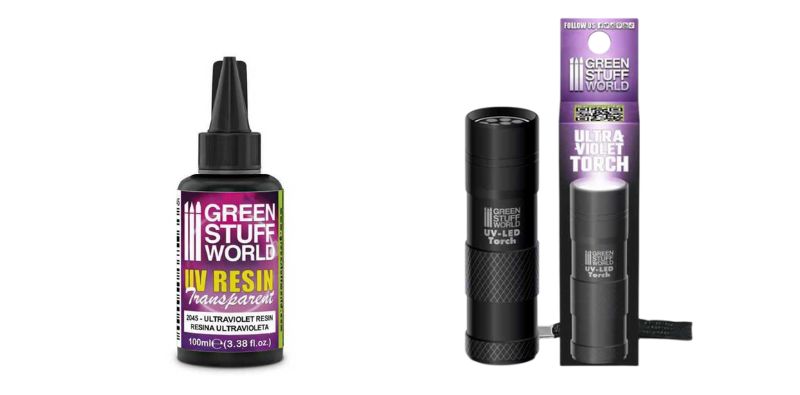
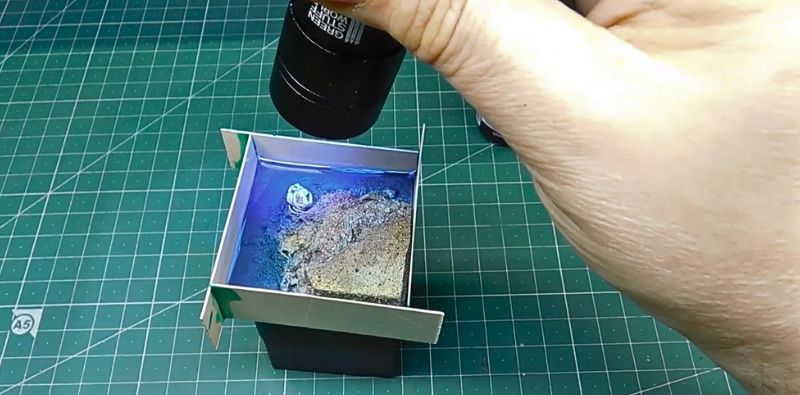
Unlike traditional resins that dry by evaporation or mixing, ultraviolet resins require direct exposure to the specific wavelength that corresponds to ultraviolet light to activate their photoinitiators. The first step is to apply the product onto a clean, dry surface in thin layers not exceeding 2 mm. Once the material is deposited, UV light must be projected constantly and closely. For small modeling pieces, a Green Stuff World ultraviolet LED lamp or UV tourch located about 5-10 cm from the piece will be enough to start the polymerization.
Exposure time is the second critical factor when learning how to cure UV resin. To know how long to cure it, the power of the light source and the opacity of the mixture must be taken into account. If dyes or pigments have been added, the light will take longer to penetrate, so the exposure time will be longer. If the product becomes completely opaque, it will not cure, as the barrier will be such that the light cannot pass through and will only dry the surface.
A standard cure ranges between 60 and 120 seconds under a professional ultraviolet LED lamp, although the factors involved in this time are so many that it is better to see how the UV resin behaves. It is important not to move the piece during this process, as any vibration can create waves or irregularities on the surface before it fully solidifies.
The process ends with the post-curing and cooling phase. It is advisable to let the piece rest for a few minutes after turning off the light to let it cool down, since curing occurs through an exothermic chemical reaction (it generates heat). This helps the polymer chains to settle and prevents the resin from cracking due to thermal shock. To finish the process, you can protect the finish with a varnish, although this is a completely optional step.
In case of emergency, when a modeler or other craftsman needs to cure it but does not have the means to do so, another recurring question is “How to cure UV resin without UV ligh?”. The answer has several nuances, and it is appropriate to explain each one well.
How to cure UV resin without UV light
Technically, you always need ultraviolet light, but it doesn't have to come from an electric flashlight like GSW's. The most powerful and free source of ultraviolet light that exists is, of course, the Sun.
To cure this liquid with sunlight, the first thing to consider is the intensity of the sun, which varies drastically depending on the time of day, the season of the year, and cloudiness. Obviously, it differs greatly depending on where on the planet each person is located. On a clear summer day, with direct sunlight, a thin layer can cure in 5-15 minutes, while on a cloudy winter day it could take up to an hour; it all depends on the weather.
The main drawback of this method is the lack of control. Direct sunlight is usually very aggressive and can cause the coating to yellow faster than with a lamp.
Furthermore, when curing this liquid without artificial ultraviolet light, it is necessary to protect the piece from dust and wind. Since it takes longer to solidify, any particle suspended in the environment can become trapped on the surface, ruining the transparency. If the day is windy and there is a danger of spoiling the piece, it can be placed next to a window. Indirect sun will also dry the coat, although the curing time increases. If the sun is direct, it could burn it, so it should be left for just enough time to dry.
Layer thickness
One of the most common mistakes when looking for information on how to cure UV resin is ignoring the material's depth limit. Ultraviolet light must be able to pass through the entire mass of resin to activate it. If you try to cure a 2 cm thick block all at once, the surface will likely harden, but the interior will remain liquid or viscous.
The ideal is to work in layers of no more than 2 or 3 millimeters. The procedure is simple: apply a layer, cure it with the flashlight for 2 to 4 minutes, and repeat the process. This not only guarantees a total cure but also allows for the addition of decorative elements at different depth levels, such as small aquatic plants, intentional bubbles, or scale fish, creating a real three-dimensional effect.
If the resin contains pigments or dyes, the curing time must increase. Pigments block part of the light's path, so the lamp will have to work longer to reach the bottom of the mixture. Remember: the darker the color you add, the thinner the layers must be to ensure complete polymerization. In fact, when dye is added, or the layer is slightly thicker than normal, it is ideal for the back of the mold used to be transparent so that it can be cured from both sides, as the light will likely not reach the bottom by curing it from only one side.
Recommended times table according to power
As explained above, not all curing methods operate with the same power and, therefore, require different drying times. This comparative table clearly shows the different options and the estimated curing times each one requires.
| Light Source Power | Layer Thickness (mm) | Estimated Time |
| GSW UV Flashlight | 1-2 mm | 2-4 min |
| GSW LED Lamp | 2-3 mm | 2-5 min |
| Direct Sunlight | 1-2 mm | 5 - 15 min |
| Sunlight (Cloudy) | 1 mm | 20 - 60 min |
This table shows the average appropriate times for each method. Some circumstances can alter them, so it is recommended to be attentive to how the product acts in each case for a result adjusted to the needs of each context.
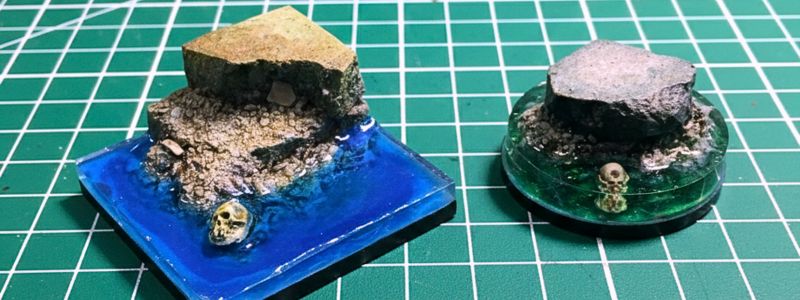
Tips for encapsulating organic elements in UV resin
Many modelers use it to simulate puddles on bases with grass or sand. It is also very common in the field of jewelry, where artisans create earrings and necklaces with flowers, leaves, and other natural elements. In these cases, it is necessary to know that organic materials can release air bubbles when heated by the curing reaction.
To avoid this, first seal the material (grass, wood, sand, flowers, small clusters, etc.) with a layer of white glue or varnish and let it dry completely before pouring the liquid over it.
This will create a barrier that will prevent the air trapped in the pores of the organic materials from rising to the surface of your resin during curing, ensuring that the finish is as clear as glass and without any type of air bubble.
Safety and maintenance of the tools
Working with ultraviolet light requires caution. It is is harmful to the retina, so it is recommended not to look directly at the UV tourch or the ultraviolet LED lamp during curing. Using UV filter glasses or working inside a curing chamber are good options.
In addition, do not forget to keep the resin bottles away from the work area while the lamp or flashlight is on, so that it does not cure inside the container and become unusable. With such a short curing time and working with layers one after another, it is common to forget to close the bottle and leave it open near the UV light, which can cause the product in the neck to solidify inside the bottle, ruining the packaging. It is also good practice to always clean the applicator nozzle after each use to ensure that the seal remains airtight so that no light passes through and the product is not spoiled.
Therefore, mastering how to cure UV resin and all the techniques for it is important to avoid mistakes and spoiling the result of the diorama or any other creation. Regardless of the tool or curing technique you use, the key is to have patience to apply thin layers and cure them before applying another. Remember all the tips we have given in this article, and your projects will have the durability and crystalline finish that only an expert is capable of achieving.
Share this content