How long does green stuff take to cure?

If you are someone who enjoys all aspects of model making, green stuff putty is sure to be an indispensable companion. Who hasn't used it to join pieces of an arm and torso that don't fit together properly? But to achieve a stunning finish, it is vitally important to use it correctly. One of the questions that often comes up for people who are new to using this material is: how long does green stuff take to dry? Below, I'll tell you everything I've learned through trial and error, so you can get it right the first time.
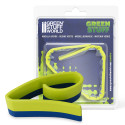
Before talking about drying times, let’s quickly refresh what green stuff is. It is a type of two-part epoxy putty (the typical blue and yellow strip) that you mix to obtain a super moldable paste, perfect for creating details, repairing figures, or even sculpting from scratch. The yellow part is the resin of the mix, while the blue part is the hardener or catalyst. At Green Stuff World, you can find this along with other putties, but the classic green stuff is the one I use most for fantasy and scenery projects.
I remember the first time I used it, it seemed almost magical—mixing those two colors and watching it become hard as stone yet still flexible. Of course, at first, I messed up several details and ended up ruining some figures rather than fixing them.
The Drying Time of Green Stuff Isn’t a Fixed Number
Many people believe it dries in 2 hours or takes a whole day, but the truth is that it depends on many factors, and here’s my experience:
• Well-mixed, better results: The most common base mix is 50/50—equal parts resin (yellow) and hardener (blue). That way, you can work with it easily for over an hour (depending on the outside temperature). Of course, you can make other combinations depending on your needs, but beware of the consequences. I use a bit more yellow when I don’t need the putty to be rock-hard or when I’m sculpting something that requires more flexibility. Once, a customer wrote to us because after a week, the putty was still sticky and hadn’t cured. Indeed, a bad mix with too much yellow and, most likely, poorly kneaded.
• Temperature and humidity: In summer, with warmth, it cures much faster. In winter or in humid places, be ready to wait. Years ago, on the coldest days of December, I fixed a miniature with some of this putty, but it wouldn’t dry at all, so I had to put it in a box with a small lamp to give it heat.
• Thickness: This is key. The thickness doesn’t directly affect drying time, nor will the inside remain soft. Green stuff cures by chemical reaction when the two parts are combined, so don’t be afraid to unleash your imagination.
So, How Long Does Green Stuff Take to Dry?
It depends a lot on how you mix the blue part (hardener) and the yellow part (resin). The more resin there is in the mixture, the longer it will take to dry and, of course, the softer or more flexible the final result will be. Conversely, the more hardener it contains, the less time it will take to cure because the chemical reaction will be completed in less time.
You also have to take into account the climate in your area. In a temperate climate, with temperatures around 18-25ºC and a 50/50 mixture, you will have about 60 minutes to model before it starts to harden. If it is colder, good news, this time will increase and you will be able to model more calmly for up to 90 minutes.
Normally, after 6-8 hours, you can touch your creation without it deforming, and after 24 hours, it should be completely cured. Remember that if you do not mix the two parts well for the appropriate amount of time, there may be unmixed pieces, which means that the curing process will not be complete, i.e., it will not harden even after waiting for months.
This product has a flexible finish, so it will always remain somewhat flexible, similar to dry chewing gum.
Can the Curing Process of Green Stuff Be Accelerated?
Of course, but carefully. I’ve seen people put it in the sun or use a hairdryer, but beware—it may crack or form a hard layer on the surface, so avoid crazy tricks. Remember, this product cures through a chemical reaction triggered when both parts are combined.
What works well is keeping the piece in a warm place, about 77–86°F (25–30ºC), with good ventilation and no cold drafts. In my workshop, I usually use a small heater in winter, which safely reduces curing time. Heat speeds up the chemical reaction. You can also place it near a heat source such as an oven, a stove (keeping a safe distance), or even the back of a fridge.
If you don’t need much working time, you can mix it with more than 50% hardener—the higher the percentage of blue, the shorter the curing time.
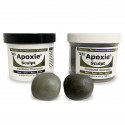
If you need something that dries fast for urgent work, Green Stuff World offers other options such as Magic Sculpt, which dries faster but is less flexible. For quick details it’s great, but keep in mind it’s not the same as classic green stuff.
Mistakes We All Make (That Save You Disappointments)
• Wrong proportions: This isn’t like one of your mom’s recipes that turns out amazing when made by eye. For your mixes, don’t go by “eyeballing,” use the proper amounts depending on the result you want. Medium hardness and working time are achieved by mixing equal parts of each color. If you want more flexibility and longer working time (but also longer curing time), add more resin than hardener. Finally, if you want a fast cure and a very hard result, use a bit more hardener.
• Poor mixing: It’s not just about choosing the right proportions—you must also knead them thoroughly. Mix the two colors until a uniform green appears. Otherwise, lumps that haven’t fused will remain and won’t cure completely, since they lack both necessary components for the chemical reaction. As a result, the fix or addition won’t last as long as you wanted.
• Handling too soon: Impatience is your enemy here. Let the green stuff dry for a few hours without touching it—at least 6 hours, although it all depends on the proportions in your mix. Remember, curing completes at 24 hours. Before that, it may feel dry to the touch but won’t be fully cured.
• Poor surface preparation: If the miniature you’re adding the putty to has dust or grease, it won’t adhere properly and may come off. Clean the surface well before applying any putty.
• Improper storage: That putty loses properties in humid or very cold places. I keep the strips in their box, in a place where it’s not too hot. On the other hand, if you expose it to strong heat for too long, the components begin to dry (not cure), forming a hard layer around the product. When you try to knead it, lumps remain that won’t fully mix, so curing won’t finish, and the result will be poor. This is called granulation.
• Too much heat: If you decide to apply indirect heat to shorten curing time, you must control the temperature. If you exceed the ideal range, the product may bubble, deform, or even swell due to gas formation, which is dangerous. Not only will you ruin the putty, but you’ll also put yourself at risk—be careful!
Which Green Stuff World Products Do I Recommend for Working with Putty?
When working with two-component modeling compounds, having the right tools makes a big difference in the final result. There are products specially designed for sculpting, smoothing, and detailing, which allow you to optimize your working time and improve precision in each project. In addition, the use of auxiliary materials such as lubricants or alternative putties provides versatility, facilitating both mixing and the creation of finer or more resistant finishes according to the needs of the piece.
At Green Stuff World, you can find a selection of tools and materials that perfectly complement any modeling job. From silicone tools that prevent the material from sticking, to clay-based putties that allow you to modify the texture of the mixture, to lubricants that improve malleability and complete sets of metal lancets for sculpting minute details. Each product offers a specific benefit and, when combined, they provide a much more comfortable and precise workflow.
Recommendations:
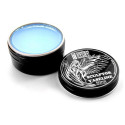
- Silicone brushes: ideal for smoothing, spreading, or shaping the surface without the material sticking. They work very well when slightly moistened to achieve smooth finishes.
- Clay-based Maxx Putty: perfect for mixing with other two-component sculpting materials, as it reduces elasticity and provides a firmer texture, ideal for sculpting solid structures or flat surfaces.
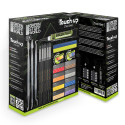
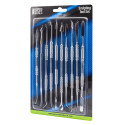
- Metal modeling tools: offer a wide variety of tips and shapes for cutting, engraving, and detailing, allowing you to work on both large areas and the smallest details.
We also have many other types of modeling tools that make working with different putties easier, preventing them from sticking to your hands or forming bubbles. You’ll also find other very useful items such as textured rolling pins, sculptor vaseline, or the Roll Maker, among many others.
Tips for Improving the Drying and Handling of Green Stuff
Although we’ve already seen how long green stuff takes to dry, these tips will help it cure in its proper time—no more, no less—for a perfect result:
• If you use spatulas or similar to mix or sculpt the putty, make sure they’re completely clean.
• If it is sticky and difficult to sculpt, apply a bit of sculptor vaseline or talcum powder to your modeling tools or your hands to prevent sticking. If you don’t have either, lightly moisten with water.
• Keep refrigerated when not in use to preserve freshness and prevent premature hardening.
If you want to learn more tricks for modeling and sculpting with different putties, check out the blog article where we explain step by step how to achieve the perfect shape and create a totally realistic cracked ice base.
If you’ve read this far, you now have a much clearer idea of how long green stuff takes to dry and how to handle it for professional results. And if you feel like trying, don’t hesitate to visit Green Stuff World, where you’ll find everything for modeling—from putties to paints and modeling tools.
Share this content