

Reference: 8436574501070ES
Brand: Green Stuff World
Liquid Mask
Review(s): 3
Liquid Mask | Liquid Masking Tape
Price €2.93 Regular price €3.25
In stock


There are 2 products.
Reference: 8436574501070ES
Brand: Green Stuff World
Liquid Mask | Liquid Masking Tape
A liquid masking tape is a protective covering used in airbrushing to shield specific areas from paint overspray. It allows for precise and controlled application of paint on a surface while preventing color from reaching masked areas. They come in various forms, including tape rolls, liquid masks, and custom-made stencils. The key to their effectiveness lies in their ability to adhere to the surface temporarily, creating a barrier that ensures clean and defined edges in your airbrushing work.
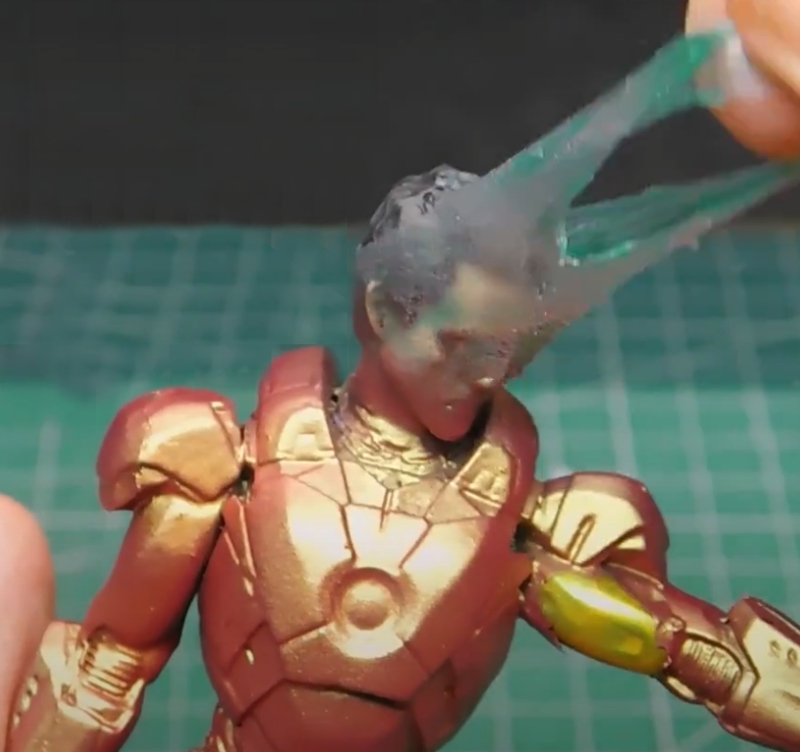
Green Stuff World liquid mask is a turquoise liquid solution that is applied to a surface using a brush or other applicator. It dries quickly to form a thin, flexible, and water-resistant film that can be easily peeled off or removed with a solvent after the painting or drawing is complete.
Its main advantage is that it can be applied to any surface, including curves and uneven surfaces, unlike all adhesive bands. It also allows for more precision and control, as it can be applied in thin layers to create fine lines and details that may be difficult to achieve with adhesive bands.
The choice of the best liquid mask tape depends on the specific application and your preferences as an artist or modeler. Here are some popular options:
When airbrushing miniatures or scale models, precision is crucial. To choose the right masking liquid for such detailed work, you must consider some factors.
To select the right tool for such meticulous work, take into account the intricacies of the design. A liquid mask tape or a custom-made stencil are the go-to choices for intricate designs, as they conform to irregular surfaces and deliver precise masking, which is indispensable for small-scale models.
Consider the size of your miniature when making a choice. For larger models, masking tape might prove effective, but for those minute details, the Green Stuff World liquid mask should be your preference.
For those who plan on reusing tools across multiple miniatures, investing in durable materials like vinyl stencils is advisable. These materials can be cleaned and used again, ensuring longevity and cost-effectiveness.
Adhesion strength is a critical factor to consider. Ensure that the chosen tool adheres firmly to the surface without leaving residue or causing damage to the underlying paint upon removal.
When dealing with models with delicate parts, give priority to materials that can be easily removed without causing damage, such as the Green Stuff World liquid mask. Opt for products that you are most familiar with and if possible have easy removal to safeguard the integrity of your models or parts.
When selecting the best liquid mask tape, consider the following key features to achieve the best results:
Creating precise masks for airbrushing scale models requires attention to detail and the right tools. Here's a step-by-step guide:
By following these steps, you can create precise masks for airbrushing scale models and achieve professional-level results.
The creation of masks involves the utilization of diverse materials, each possessing distinct advantages suited for various applications. Among these materials is masking tape, a widely employed choice known for its versatility in different projects. With varying widths and adhesion strengths, this tape is easy to cut, apply, and remove.
Ultimately, the selection of masking material is contingent on factors such as project complexity, desired precision, and personal preference.
Airbrushing masks can be crafted from a variety of materials where the vast majority are single-use products, each possessing distinct advantages tailored to diverse applications.
There are only 3 products that can be really reusable since most of them will have problems sticking again to the surface once used, or simply because they have absorbed paint which has damaged their consistency or resistance making their successive uses unfeasible, and these will be as follows:
Ultimately, the selection of a masking material hinges on factors such as project complexity, desired precision, and personal preference.
It is essential to prioritize a few key considerations for a polished and professional finish. Begin by meticulously preparing the surface, ensuring it is devoid of any dust, oils, or imperfections that could compromise the adhesion of the product and the quality of the edges.
Selecting the right material is paramount. Depending on the complexity of the shapes involved, options such as masking tape liquid, custom stencils, and vinyl masks can be excellent choices to achieve precision and sharp edges.
Securely affix the edges of the mask to the surface, using a burnishing tool or the back of your fingernail to press down firmly and prevent any unwanted paint bleed. When airbrushing, apply paint in light and even coats, maintaining a distance to avoid forcing paint underneath the masked edges.
When it comes time to remove the liquid mask, exercise care and consistency. Avoid abrupt or jerky movements that could lead to tearing, leaving behind uneven and ragged edges. If necessary, employ a fine brush to touch up any imperfections along the masked edges with matching paint colors.
Remember that achieving mastery in clean edges through airbrushing demands practice. Exercise patience, allowing yourself to learn and refine your technique with each project. With consistent practice and attention to detail, you can reliably produce clean and sharp edges, elevating the overall quality of your airbrushing work.
