Worbla vs ThermoArt Comparative
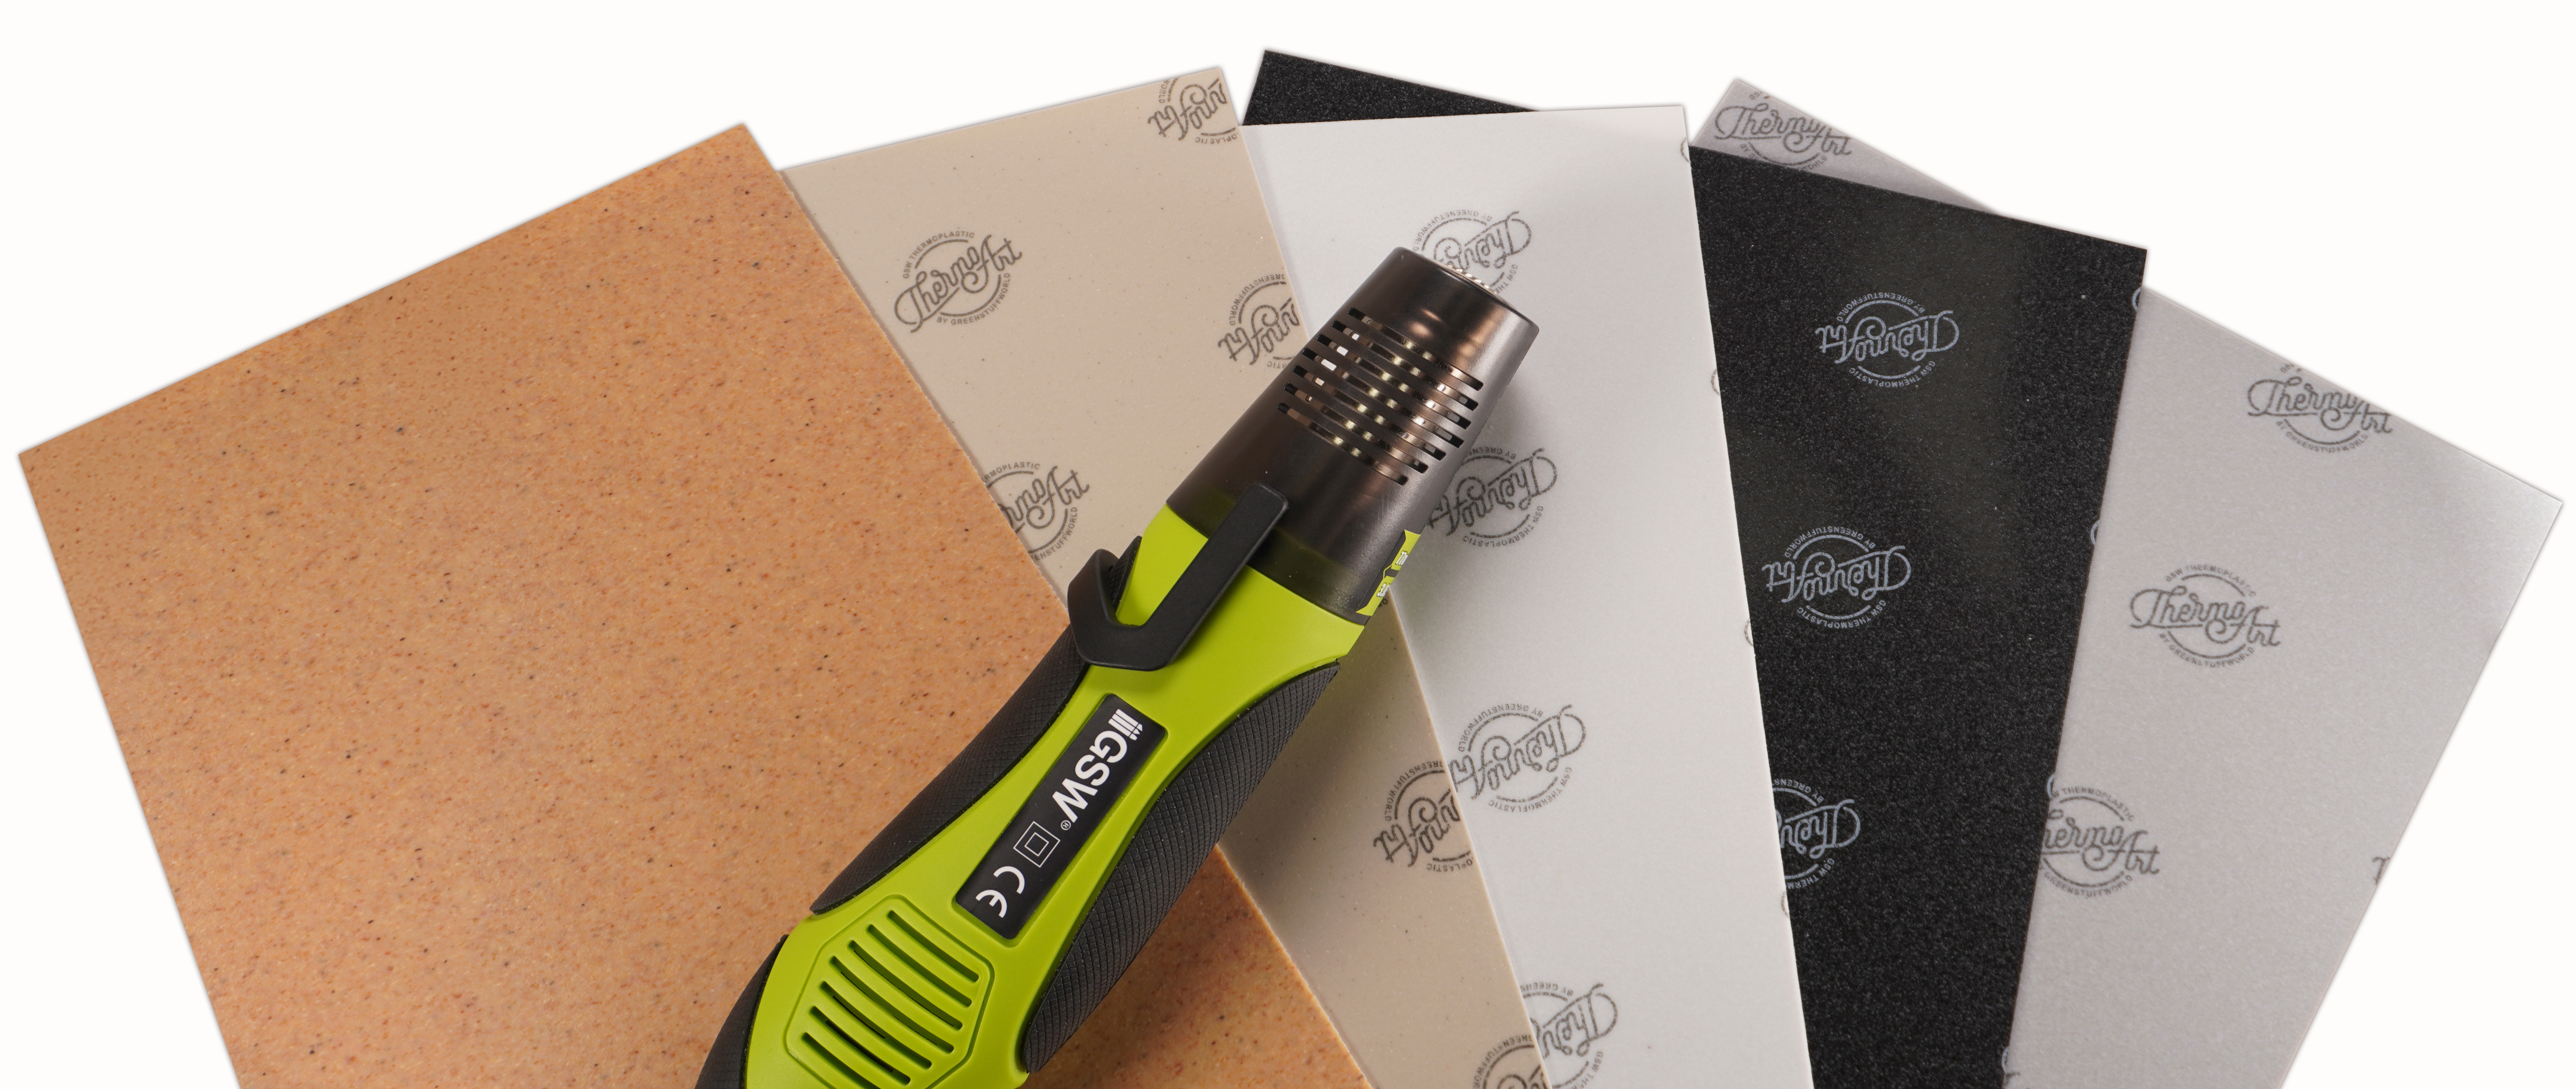
Worbla and ThermoArt are two brands of cosplay Thermoplastics with similar characteristics available on the market and used above all in cosplay and in the world of crafts. These two cosplay thermoplastics stand out for their ability to become flexible when heated, allowing artists to mold them as they wish to create different parts or details of their costumes, such as breastplates, bracers, or helmets, among many others. When cooled, it hardens completely again, becoming a solid and stable structure.
These materials, used alone or in combination with EVA Foam, are very versatile, not only because of the number of shapes they can be molded into but also because, once used, they can be reheated to turn into a different piece for another costume. Both materials produce no waste, as any small scraps can be reheated to create something new. Despite their common characteristics, they differ in certain features that may make you choose one brand or the other.
What is Worbla?
Worbla, as we have mentioned, is a type of heat-moldable thermoplastic widely used in the world of cosplay, as well as in the creation of props and other artistic projects. It is sold in various colors, the most popular of which is brown, known as Worbla Finest Art, due to the wood fillers that give it its characteristic color as well as its texture. It can be activated using a heat air gun, hot water, or even an oven, making it flexible so it can be molded however the artist wishes.
This material is manufactured by Rhenoflex GmbH, a company specializing in the development and production of adhesive and sealing solutions for industrial applications with a strong link to the footwear sector. The material is marketed under the name Worbla for the Cosplay sector and as RX5050 for the orthopedic sector. At the end of 2022, it was bought by the British company Coats Group plc, which, together with the purchase of its competitor Texon Non-Woven Ltd, allows it to expand its innovation and technology capabilities to offer high-performance products in sectors such as automotive, construction, and other industrial markets.
The brand manufacturer has several types of thermoplastic Worbla, the best known being the brown one. However, it is also available in black, called Black Worbla, with a mesh on one side to give it more flexibility, and Worbla Deco Art, a thermoplastic that comes in the form of beads that can be molded.
Take into account that, in addition to these two materials for comparison in this review, on the market, there are other similar materials with similar properties, such as Cosplayflex, Wonderflex, and Fosshape, among others, in both sheet and plastic pellet formats, each one with its own differences, to be considered as possible Worbla alternatives.
What are their comparative technical features?
Below is a comparative table detailing the main characteristics of two materials widely used in cosplay and crafts: Worbla vs ThermoArt. Both offer similar technical properties but differ in aspects such as weight, finish, price, and sustainability. It should be noted that both brands have several different types of thermoplastics within their respective families, with small and large differences both between them and those of other brands, and I am not only talking about color, but also about their characteristics. For this reason, in this comparison, only the basic product of each of the manufacturers will be compared.
We hope this comparison will make it easier for you to choose the right material for your projects.
| Worbla | ThermoArt | |
| Manufacturer | Rhenoflex | Green Stuff World |
| Manufacturing country | Germany | Spain |
| Material | Thermoplastic with hot-melt adhesive | Thermoplastic with hot-melt adhesive |
| Adhesive | Both sides adhesive | Both sides adhesive |
| Charge | Wood fillers | Mineral fillers |
| Recycling Content | 30% | 35% |
| Recyclable | 100% | 100% |
| Manufacturing | Extruded | Extruded |
| Thickness | 1 mm | 1 mm |
| Hardness | 90ºShoreA | 90ºShoreA |
| Density | 1184 Kg/m3 | 1200 Kg/m3 |
| Stiffness | High | High |
| Colors | Beige, White, Black, and Red | Beige, White, Black, and Grey |
| Heating time | 15-30 seg. | 15-30 seg. |
| Working temperature for molding and gluing | 80-90 °C approx. | 70-80 °C approx. |
| Processing time | 3-4 minutes | 3-4 minutes |
| Flashpoint | > 200 °C | > 200 °C |
| Reusable leftovers | Yes | Yes |
Main characteristics of Worbla and ThermoArt
• Made from a mixture of cellulose and polyester with mineral or wood fillers.
• They can be sanded; in fact, it is advisable to do so before painting them.
• They can be easily cut with normal scissors or a craft knife.
• They can be painted with various types of paint, such as spray paint, acrylic paint, or airbrush paint. As they are flexible materials, it is especially recommended to use flexible paints.
• Before applying a primer, it is recommended to sand it first to ensure better paint adhesion. After this, you can paint it with the chosen paint without any problems. A flexible base will help subsequent layers of paint adhere and withstand twisting better.
• Neither thermoart nor worbla are waterproof, but they do resist humidity. This means that they can withstand exposure to water and humidity without deforming or deteriorating significantly. However, they are not completely waterproof materials that prevent the passage of water completely, so it is not recommended for suits that are constantly in contact with a liquid. Both materials have a similar resistance, we have not detected any appreciable differences.
• To shape it, after heating it, you can use your hands, modeling tools, or vacuum molds. You can also stretch, fold, glue, and combine different pieces of material such as foamed PVC or EVA Foam.
Pros and cons of Worbla and ThermoArt
Despite being very popular and in demand in the world of cosplay, like all materials, there are always advantages and disadvantages, which means that their performance must be carefully evaluated for each project. This analysis presents the main pros and cons to help you make an informed decision.
• They require few tools. To use them, you don't need technical knowledge or hobby tools beyond the chosen method of heating.
• Versatile. A wide variety of objects can be created, from armor and weapons to accessories and decorations.
• Reusable. Leftovers and scraps can be reheated and molded, reducing waste and allowing for error correction.
• Lightweight and resistant. Despite their lightness, both are quite resistant to impact and bending, making them ideal for projects that require durability.
• They can be painted and decorated. Once cold and hardened, they can be sanded, painted, varnished, and decorated with different techniques and materials.
• They stick to themselves. Different pieces of themselves are easily joined to themselves by applying heat, which simplifies the construction of complex objects. But also, the two materials of different brands can be joined together by applying heat, allowing them to be combined.
• Easy to cut. A pair of scissors is all that is needed to cut these materials, making it easy to separate the amount of product required for each project.
• They are non-toxic. They do not contain solvents or harmful chemicals, which makes them quite safe to use.
• Sensitive to heat. If exposed to high temperatures, it can deform or, in extreme cases, melt. Therefore, it is not recommended for suits that will be exposed to constant heat sources. Don't leave your suit in a car on a summer's day, you know what could happen.
• They require practice. Although they are easy to use, it is necessary to practice to master the molding techniques and achieve professional results.
• They are not totally waterproof. Despite their moisture resistance, they are not completely waterproof and can become deformed if immersed in water for a prolonged period or if excessively wet.
The main differences of the 2 basic materials of both brands can be found in 4 points: price, painting, texture, and thermoforming.
• Price. Worbla is more expensive compared to other options such as EVA Foam and the ThermoArt family of thermoplastics. The Worbla price comparison is explained below.
• Painting. Painting both materials is very easy; tests have been carried out with a paint brush and acrylic paint, and in both materials, the paint adheres easily.
The photo below shows the result after applying 1 coat of paint, and as you can see in one of them, the granulation or texture is more visible than in the other. Thermoart would be finished after 1 coat of paint, and Worbla will require either more paint or perhaps a special primer to completely hide its texture.
However, there are products on the market, such as our super flexible primer, to solve these problems.
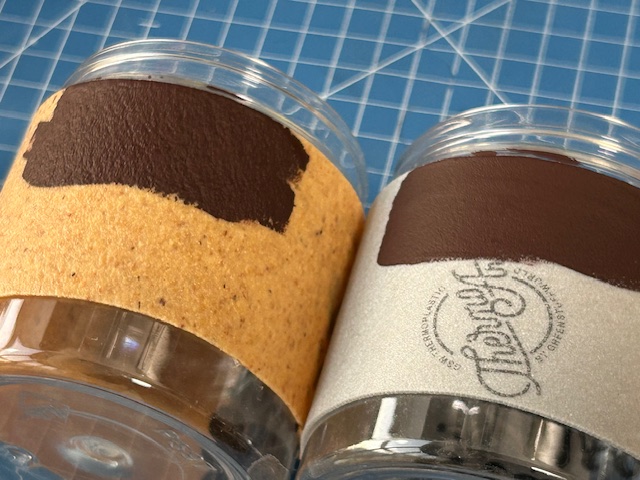
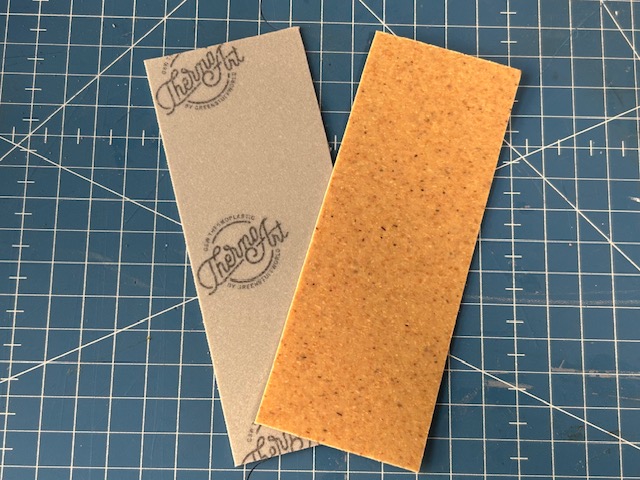
• Texture. The surface of both materials is slightly rough, but Worbla is rougher than ThermoArt due to the size of the particles used in its manufacture, which could require additional sanding and preparation before painting. This roughness is mainly apparent when handling and heating the material.
Two pieces of the basic version of each brand of the same size before heating:
We heat them a little and stretch the same distance:
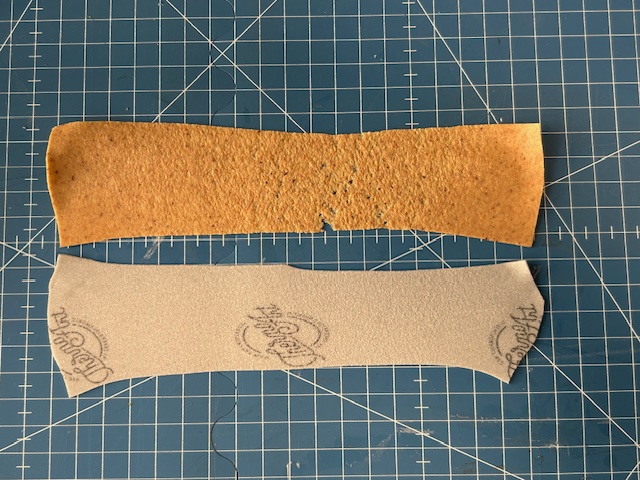
Detail of the two materials after heating
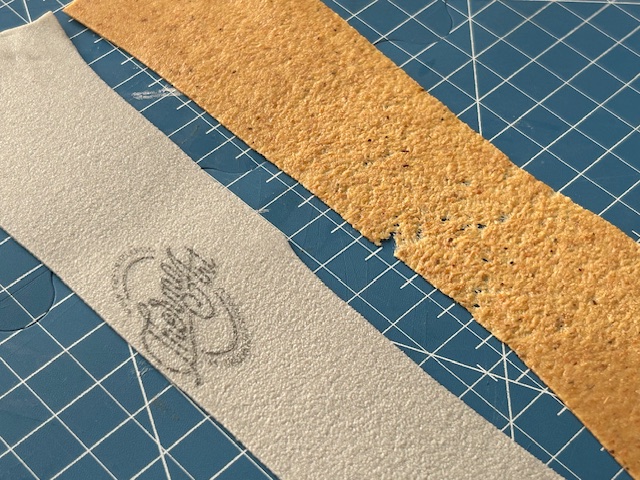
• Thermoforming. These types of materials are not the most suitable for thermoforming because if you stretch them they tend to show the internal fillers. However, when thermoforming the basic version Finest Art compared to the basic version Armor Grey, it has great problems picking up the details of the pieces as well as the graininess of the internal load. Both materials have problems picking up the exact shape of the bottle cap used for the test. For these functions we recommend using other materials designed for this function, such as Transparent ThermoArt.
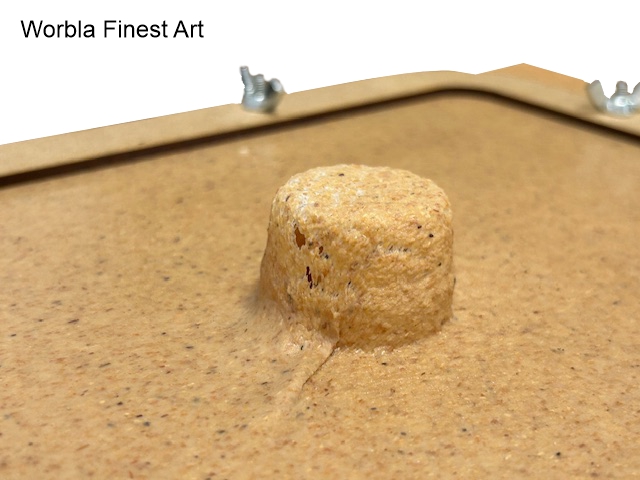
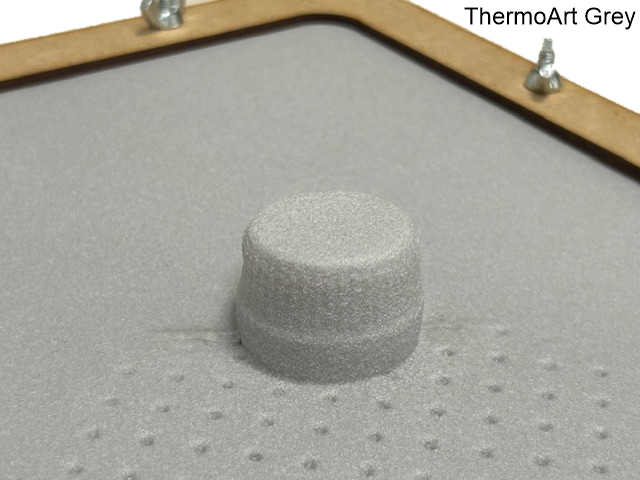
Note: These tests were carried out with the same amount of material from all of them, in the same thermoforming machine, with the same heat gun, to copy the shape of the same bottle cap.
How to use Worbla and ThermoArt thermoplastic?
The procedure for working with both materials is practically the same. The only slightly different phase would be the sanding stage, as often a simple primer on the basic version of ThermoArt would be sufficient. As we have seen above, the basic version of the German material, on the other hand, needs more sanding to completely eliminate the orange peel finish and the grain of the wood.To achieve optimal results when handling it, it is essential to understand how it is activated and to work on its shaping techniques. A practical method is described below:
1.- Preparation and cutting: Start by cutting the material to the desired shape using scissors or a modeling cutter. Although it can be cut cold, planning the cuts beforehand helps to avoid mistakes and facilitates subsequent modeling, especially in complex designs.
2.- Heat activation: The next step is to heat the material to make it flexible. This can be achieved with a heat gun, steam, or even hot water, reaching approximately 80 °C (176 °F). It is important to keep the heat source at a suitable distance to achieve an even distribution. In this state, it becomes soft, malleable, and slightly adhesive.
3.- Modeling and shaping: Once activated, you can shape it into the desired form either by hand or using molds. Its flexibility allows you to create both flat surfaces and curved and complex structures. If you make a mistake, you can reheat it to adjust the design without problems.
4.- Component assembly: One of its advantages is its self-adhesive properties when activated. This allows different pieces to be joined without the need for additional adhesives, facilitating the construction of composite projects, such as frames or accessories with multiple parts.
5.- Cooling and solidification: Once the desired mold has been obtained, it is left to cool and harden, which takes place in a few minutes. This cooling fixes the shape, allowing the object to retain the worked structure until it is reheated.
6.- Finishing and details: If you are looking for a smooth finish, in both cases, it is possible to apply an acrylic primer or base coat before painting. In addition, for fine details, you can layer or use modeling tools while the material is still warm.
Both products are highly versatile and tolerant of mistakes, making them an ideal choice for beginners and experts alike looking to create detailed and resistant pieces in their cosplay projects.
How much do Worbla and Thermoart cost? Price comparison
A comparison of the prices of Worbla Foam and ThermoArt thermoplastics reveals significant differences that can influence the choice of material depending on the budget and the specific needs of the project.
Worbla is mainly produced in Germany and for a sheet size of 75x50cm, a size that both manufacturers have in their catalog, its cost is between €42.66 and €60.21/m² depending on the supplier and the location of the purchase. However, its grainy texture and the need to apply additional finishes can influence the time and additional costs of the project.
Amazon: 60,21€/m²
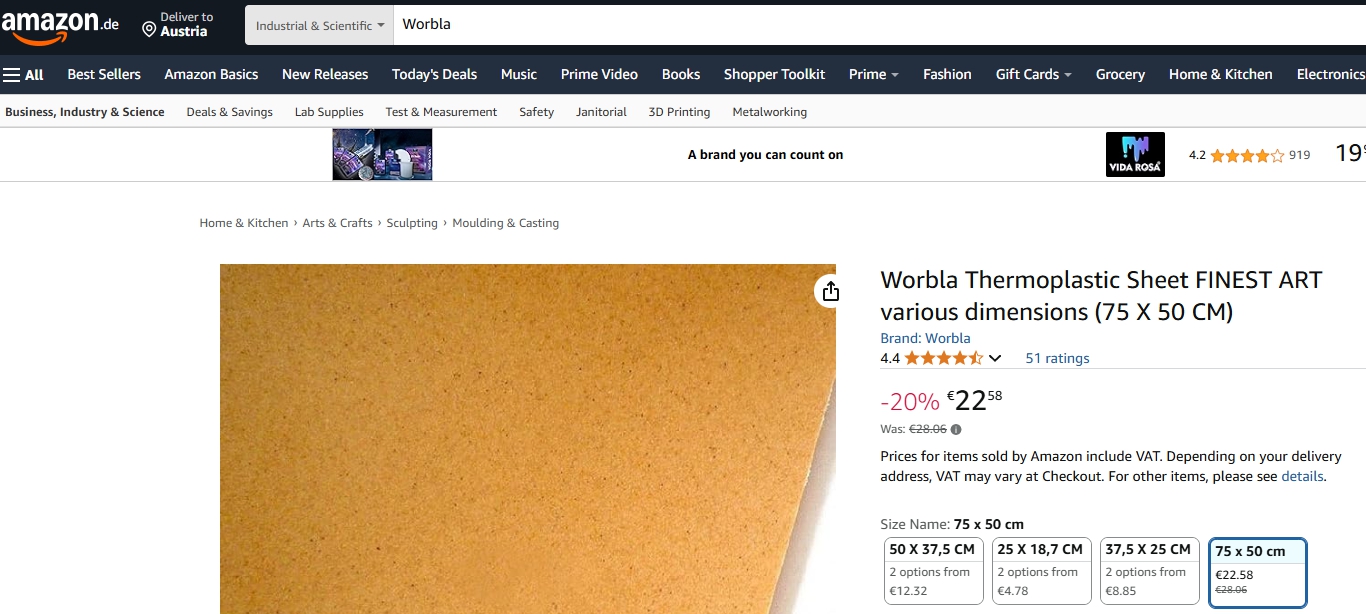
Date of Screenshot from Amazon.de 20/03/2025
Distributor: 42,66€/m²
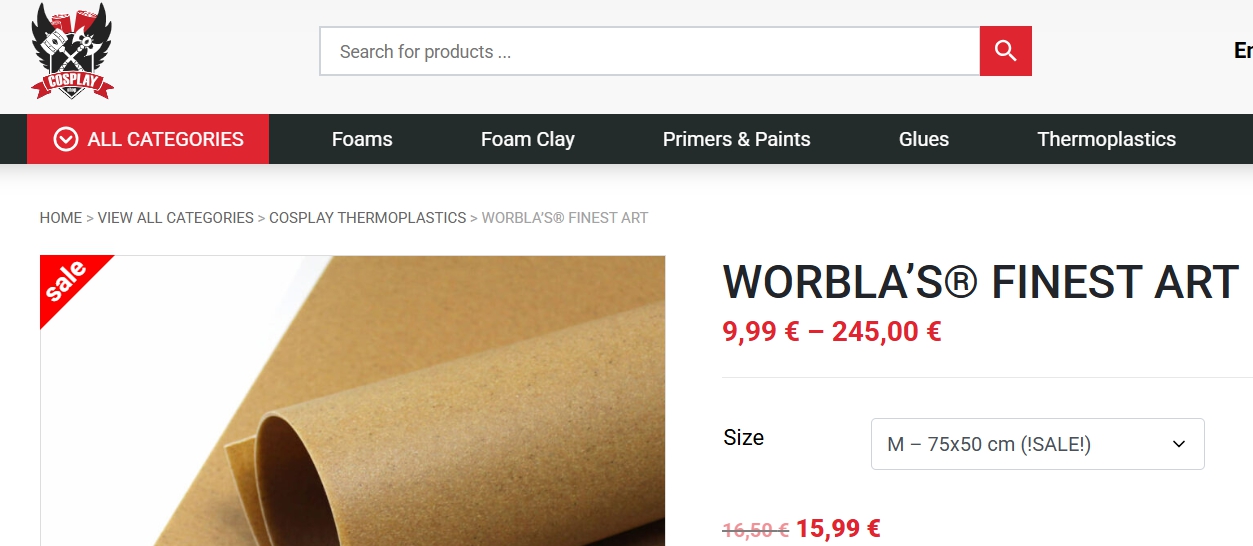
Date of Screenshot 20/03/2025
On the other hand, ThermoArt is a relatively new material manufactured by Green Stuff World in Spain, but it has quickly gained popularity due to its performance and considerably lower price, around 24.93€/m², which makes it more accessible to a greater number of people.
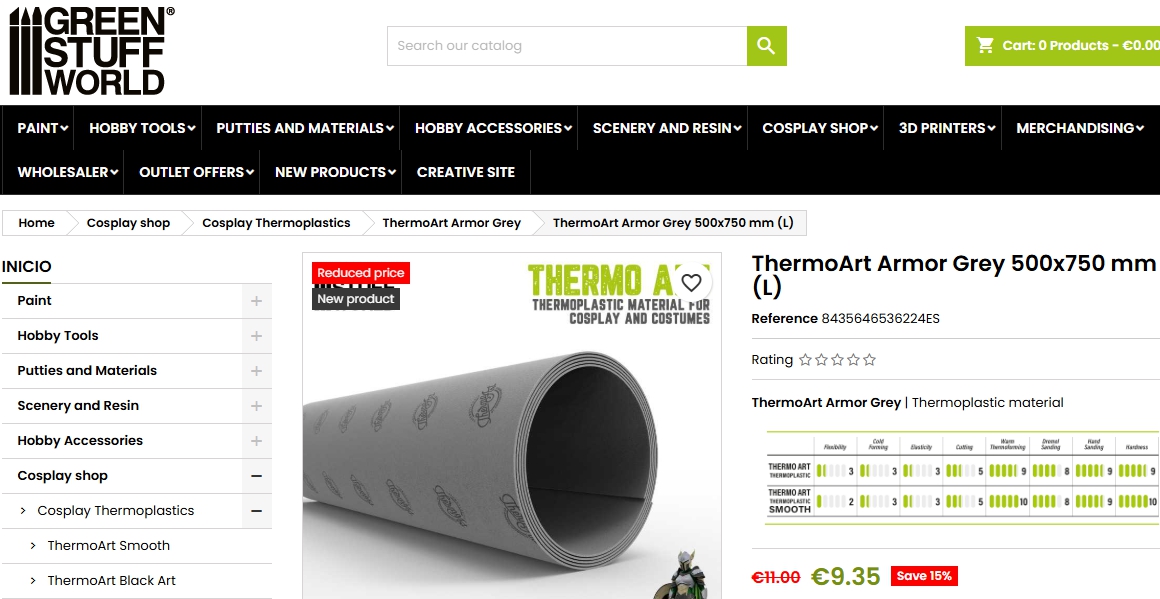
Date of Screenshot 20/03/2025
Despite the differences in the manufacturing process and texture, ThermoArt maintains a competitive quality for its price, making it a preferred option for those looking for excellent value for money. Both materials can be reused, which increases their long-term value. Leftover scraps can be recycled simply by reheating them, allowing them to be used in future projects without losing any of their properties.
Ultimately, the choice between one or the other will depend not only on the available budget but also on personal preferences and the desired final finish for each project. Both materials are excellent options for boosting creativity in the world of cosplay.
Is ThermoArt the best Worbla alternatives?
Well, in reality, both options are very interesting since either of them will allow you to create all kinds of armor, weapons, or Cosplay props. However, to determine who wins the Worbla vs. ThermoArt comparison, you will have to analyze your particular needs and analyze the strengths and weaknesses of each of the options.
On a technical level, both Cosplay thermoplastics have very similar characteristics: they are molded at similar temperatures, have the same Shore-A hardness, and have similar heating and processing times. ThermoArt is considerably cheaper and offers a finer finish thanks to its smaller grain mineral fillers, which makes it possible to obtain pieces with superior details practically without sanding, saving a lot of time and improving the finishes.
Worbla is made of 30% recycled material and thermoart 35%, so the two materials are more or less at the same point in terms of sustainability.
In summary, although the two materials are very similar, the choice between the two will depend on the user's preferences and what each one is used to, as well as how easy it is to buy them. The 2 manufacturers have other items in their catalogues besides the 2 basic items compared, which are worth trying, as well as other brands of thermoplastics different to these 2 which could have properties that could be useful at some point.
Disclaimer: This blog post is provided for general information purposes only in compliance with Directive 2006/114/EC on comparative advertising. All registered trademarks, company names, and trade names used on this website are the property of their respective owners. Technical data is obtained directly from related websites, each manufacturer's website, and their marketing materials, as well as through the use of specific measuring tools such as durometers or precision scales, among others. The calculations and prices have been obtained from websites available to everyone, including Amazon and the distributor of Worbla material. Screenshots have been taken to provide a still image of the moment when the comparison was made.
To report corrections, please contact us.
Last updated March 27, 2025
Share this content


