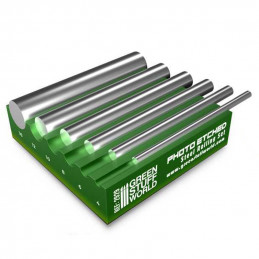
Reference: 8435646502892ES
Brand: Green Stuff World
Photo Etched Rolling Set
Review(s): 0
Photo Etched Rolling Set | Photo Etch Rolling tool | Photo-etched Bender
Price €28.80 Regular price €32.00
In stock
There are 24 products.
Reference: 8435646502892ES
Brand: Green Stuff World
Photo Etched Rolling Set | Photo Etch Rolling tool | Photo-etched Bender
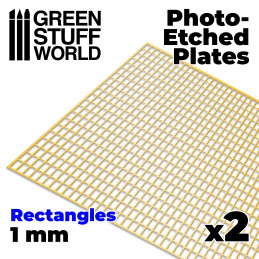
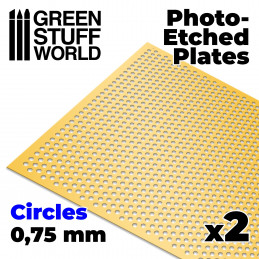
Reference: 8435646501161ES
Brand: Green Stuff World
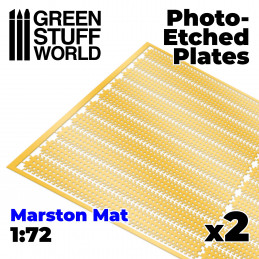
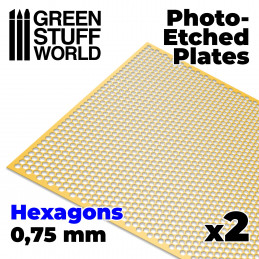
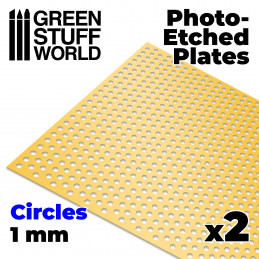
Photo-etched plates for decorating miniatures and dioramas.
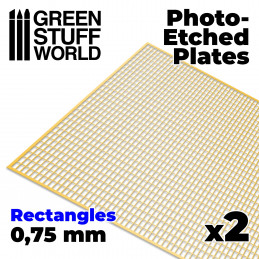
Reference: 8435646501154ES
Brand: Green Stuff World
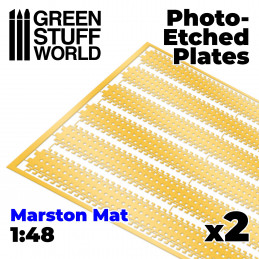
Photo-etched plates for decorating miniatures and dioramas.
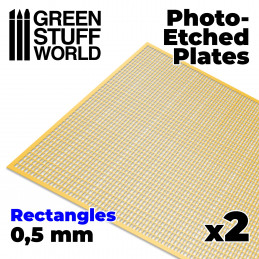
Reference: 8435646501147ES
Brand: Green Stuff World
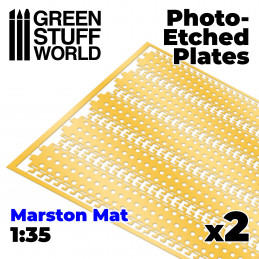
Photo-etched plates for decorating miniatures and dioramas.
Reference: 8436574506709ES
Brand: Green Stuff World
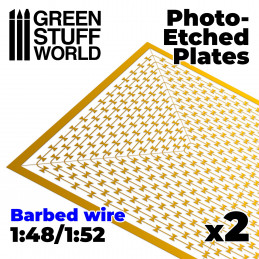
Photo-etched plates for decorating miniatures and dioramas.
Reference: 8436574506112ES
Brand: Green Stuff World
Photo-etched plates for decorating miniatures and dioramas.
Reference: 8436574506105ES
Brand: Green Stuff World
Photo-etched plates for decorating miniatures and dioramas.
Reference: 8436574506099ES
Brand: Green Stuff World
Photo-etched plates for decorating miniatures and dioramas.
Reference: 8436574508260ES
Brand: Green Stuff World
Templar Cross symbols for decorating.
Reference: 8436574506082ES
Brand: Green Stuff World
Photo-etched plates for decorating miniatures and dioramas.
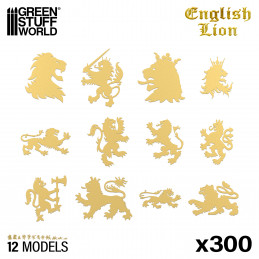
Reference: 8436574508253ES
Brand: Green Stuff World
English Lion symbols for decorating.
Reference: 8436574506075ES
Brand: Green Stuff World
Photo-etched plates for decorating miniatures and dioramas.
Reference: 8436574504712ES
Brand: Green Stuff World
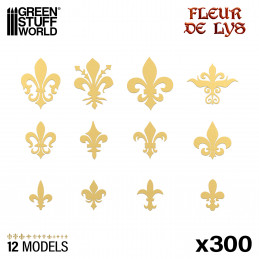
Fleur de Lys symbols for decorating.
Reference: 8436574506068ES
Brand: Green Stuff World
Photo-etched plates for decorating miniatures and dioramas.
Reference: 8436574504705ES
Brand: Green Stuff World
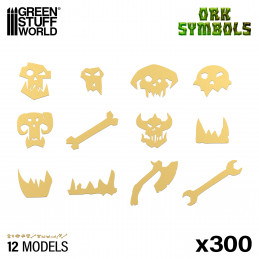
Ork runes and symbols for decorating.
Reference: 8436574506051ES
Brand: Green Stuff World
Photo-etched plates for decorating miniatures and dioramas.
Photo etched model parts, also known as photochemical etching or photochemical machining, is a manufacturing process used to produce precision metal parts and components for various applications, including scale models in the context of model making and miniature engineering. It is a technique that involves using chemicals and light-sensitive materials to selectively remove material from a metal sheet, leaving behind intricate and finely detailed patterns or designs.
Photo etching is favored in the creation of models and miniatures. for several reasons:
Scale model enthusiasts often use photoengravings to enhance the realism and accuracy of their models, especially for replicating fine details like grilles, railings, and other intricate components found in vehicles, aircraft, ships, and architectural models.
Attaching photo etched model parts requires care and precision to ensure that the parts are securely affixed and appear realistic. Here are some common methods for attaching them to models:
When working with photo-etched parts, it's also important to consider how you finish them. For instance, after attaching the parts, you might want to apply metallic paints to give them a realistic, weathered look that fits the overall aesthetic of your model
Regardless of the adhesive you choose, it's essential to work with clean and dry surfaces. Also, practice on scrap pieces or less visible areas of your miniature to become comfortable with the attachment method and ensure that it won't damage your model's finish. Patience and precision are key when working with photoengravings, as they are often delicate and require careful handling during attachment.
Rusting a photo-etched piece in scale modeling serves several purposes and can significantly enhance realism and authenticity. You can do it in a similar way with acrylic paints or in a natural way with an oxidizing agent such as Oxidizer.
Here are some reasons why you might want to rust a photoetched piece:
To rust a photoetched piece, you can use various modeling techniques and materials, such as weathering powders, rust-colored paints, washes, and dry brushing. The specific approach you take will depend on the type of rust effect you want to achieve and the scale and context of your figures.
Keep in mind that while rust can enhance realism, it's essential to apply it judiciously and in a manner that's consistent with the story and context you want to convey. Overdoing the rusting effect can make it look unrealistic or detract from its overall appearance, so practice and experimentation are key to achieving the desired results.